See the Arduino sketch/program here & the Python supervisor here or here for the Arduino Watchdog.
The central heating timer software, running on the Arduino, is surprisingly long for what would seem on the face of it quite a simple device. This seems to suggest that my software is not very compact or efficient and I make absolutely no claims about this or about the elegance of my programming style! (The program can be viewed here.) Also, the program constantly runs up against warnings about the space taken up by variables and I have done my best to minimise this but undoubtedly many improvements could be made. However, It does have the virtue of working reliably over a period of years with very few crashes or unexpected events.
The main function of the software is to know the current time and have a list of on/off times and desired temperature levels stored in a non-volatile form. It needs to respond to inputs from buttons and switches on the unit and commands and requests for data from a remote computer over the network using User Datagram Protocol (UDP). It also needs to read and respond to temperature sensors etc. The on/off times and desired temperature levels are stored on an SD card on the Ethernet shield. The temperature registered by the sensors is also stored in a log file on the SD card.
The remote computer runs a supervisor program written in Python. Programs could be running simultaneously on any number of computers but I have (mostly) settled on one Raspberry Pi with other PCs, tablets etc. interacting with the Pi using the remote desktop application VNC which comes free with the Pi and the VNC viewer being free to download for PCs, tablets etc. One version of the supervisor program can be seen here.
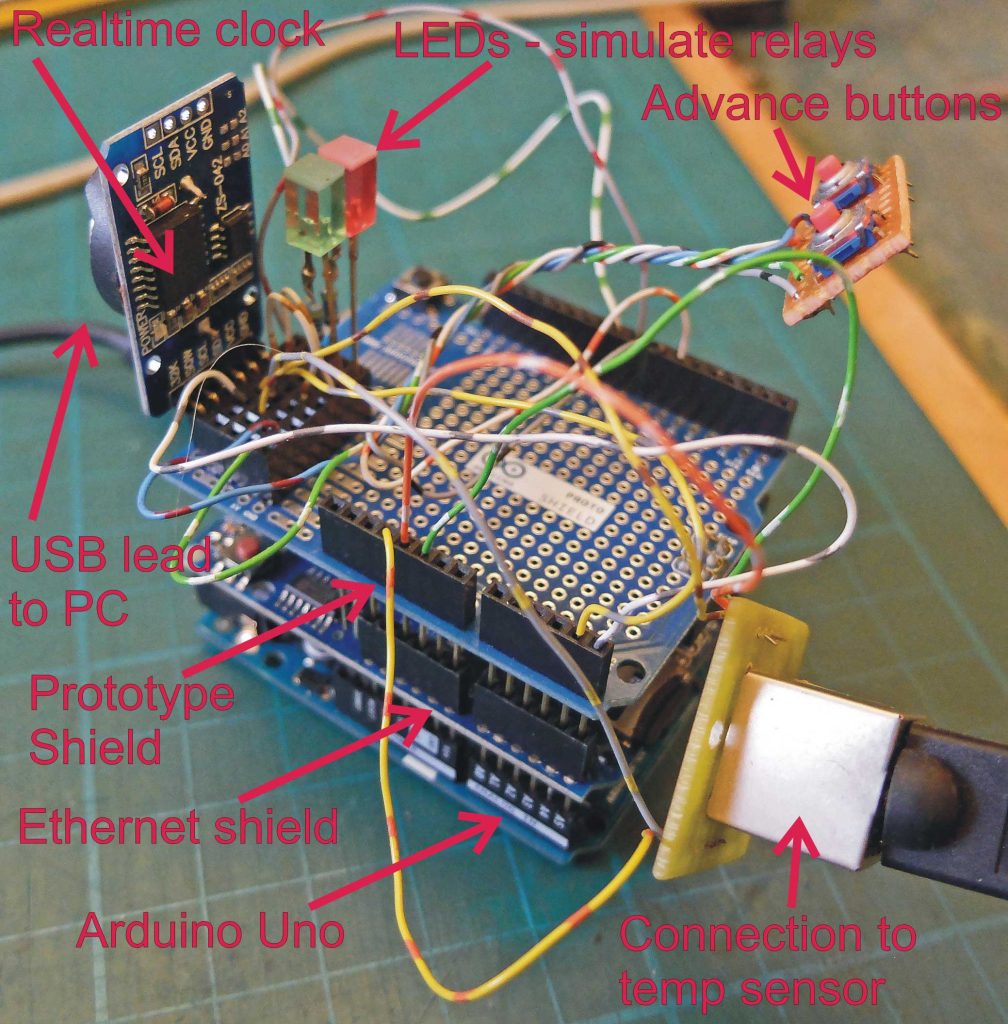
Left is the “lash up” I used to develop the Arduino software. The LEDs stand in for the relays. Hopefully, the comments on the Arduino will be sufficient to explain how the program works. One thing to be noted is that, in connection with the advance function, pressing a button engages an advance to the next period (which could be “on” or “off”) as you would expect. Pressing the button a second time will do nothing. To cancel the advance, the reset button needs to be pressed. Rather crude, but it avoids any confusion! A slight disadvantage is that all advances will be cancelled, so in the event of two advances being in operation, and only one needing to be cleared, the advance, which is still required, will have to be reset.
Supervisor Software
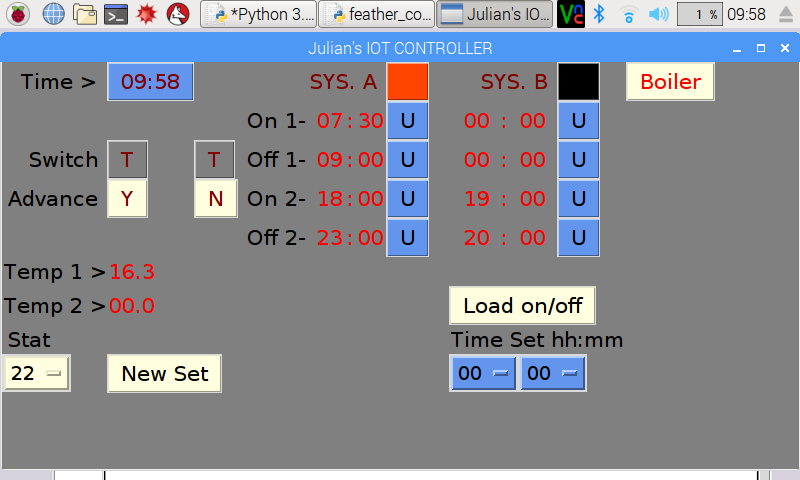
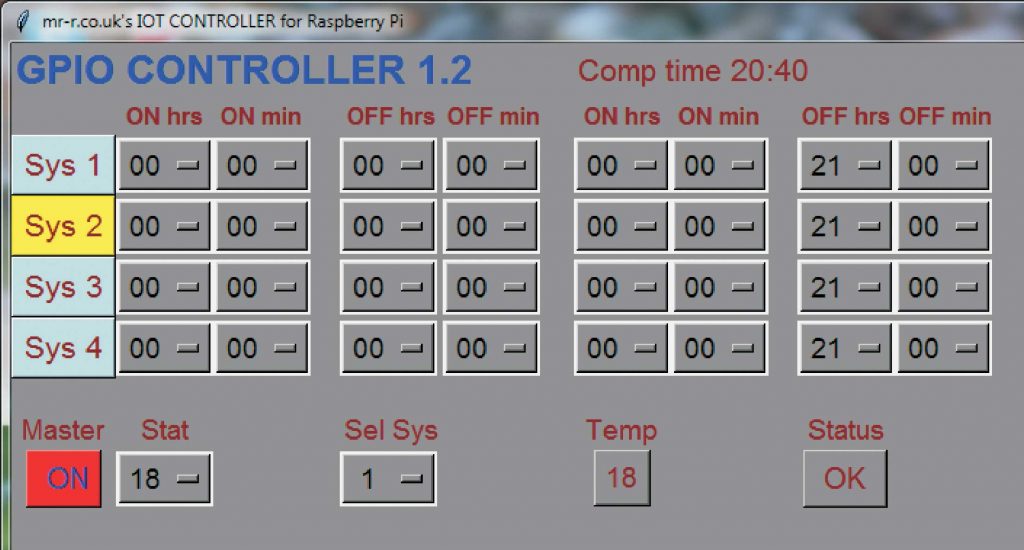
Above is a screen shot of the Python control program which can run on a PC or a Raspberry Pi. See the software here. It uses a Tkinter GUI which looks a bit like Visal Basic for Windows from the 1990s but it works just fine! “SYS A” is heating and “SYS B” is water. (I have used these generic headings as I use this software to control things other than the boiler.) The “Switch” box gives the positions of the toggle switches on the unit. “T” = timed, “O” = off and “C” = continuous. Clicking on the advance button advances the timer and the button goes from “N” to “Y” to reflect this. When either system is on, the corresponding box is red. When off, it is black. When the timer is on but the temperature sensor turns off the boiler, the box turns amber.
To upload a new on/off time, the time required is selected using the drop down menus at the bottom of the screen under “Times hh:mm”. To apply this time click on the appropriate “U” button. The time selected will appear adjacent to the “U”. Then click the “Load times” button to update the remote Arduino timer. The stat can be similarly updated using the drop down menu and “Set” button associated with it.
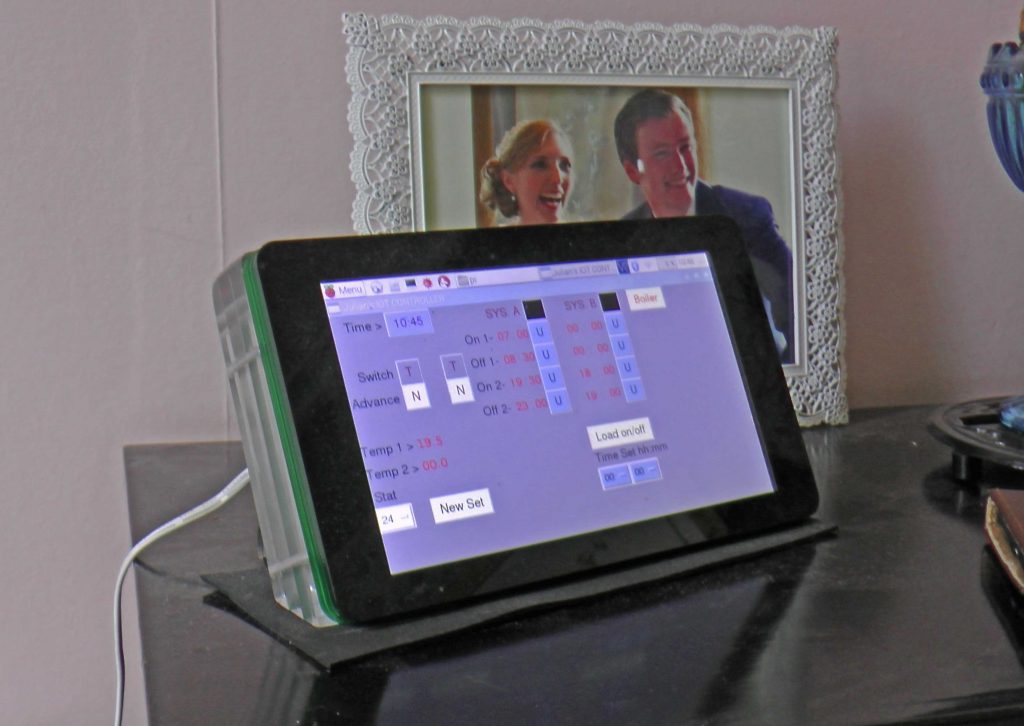
In an earlier version of the software, I had menus etc. to reset the Arduino clock. Given that the DS3231 seems to keep very good time (especially compared to the clock on the Feather Wing!) it didn’t seem necessary to retain it. Also, I found that I couldn’t get it all in on the Raspberry Pi “Official” touch screen at the default resolution. (Later, I put more pixels on the screen and could accommodate everything but at the expense of ease of touch screen use – your fingers tend to be just a little too big!) Basically, if I want to change the clock, I use another program (for “historical reasons” this tends to be running on the Processing language). It would be possible to set the clock using time from the Raspberry Pi (which, I think, gets it from the Internet) either manually or automatically but this is another improvement for the future at present.
The screenshot below gives a hint as to how the Python Supervisor program could be developed to provide, say, more on/off times in the day and individual settings for different days of the week. I favour this spreadsheet like display as it shows at a glance what has been set rather than having to scroll though menu after menu. However, again, this is a development for another day!