
A pergola provides a focal point in the garden and gives you plants something to climb up (in a short time they will take over and you may never see it again! I must learn how to prune!) This is fairly modest pergola and reasonably easy to make in that it doesn’t require much joinery work, mainly just cutting to length. First comes the plan…
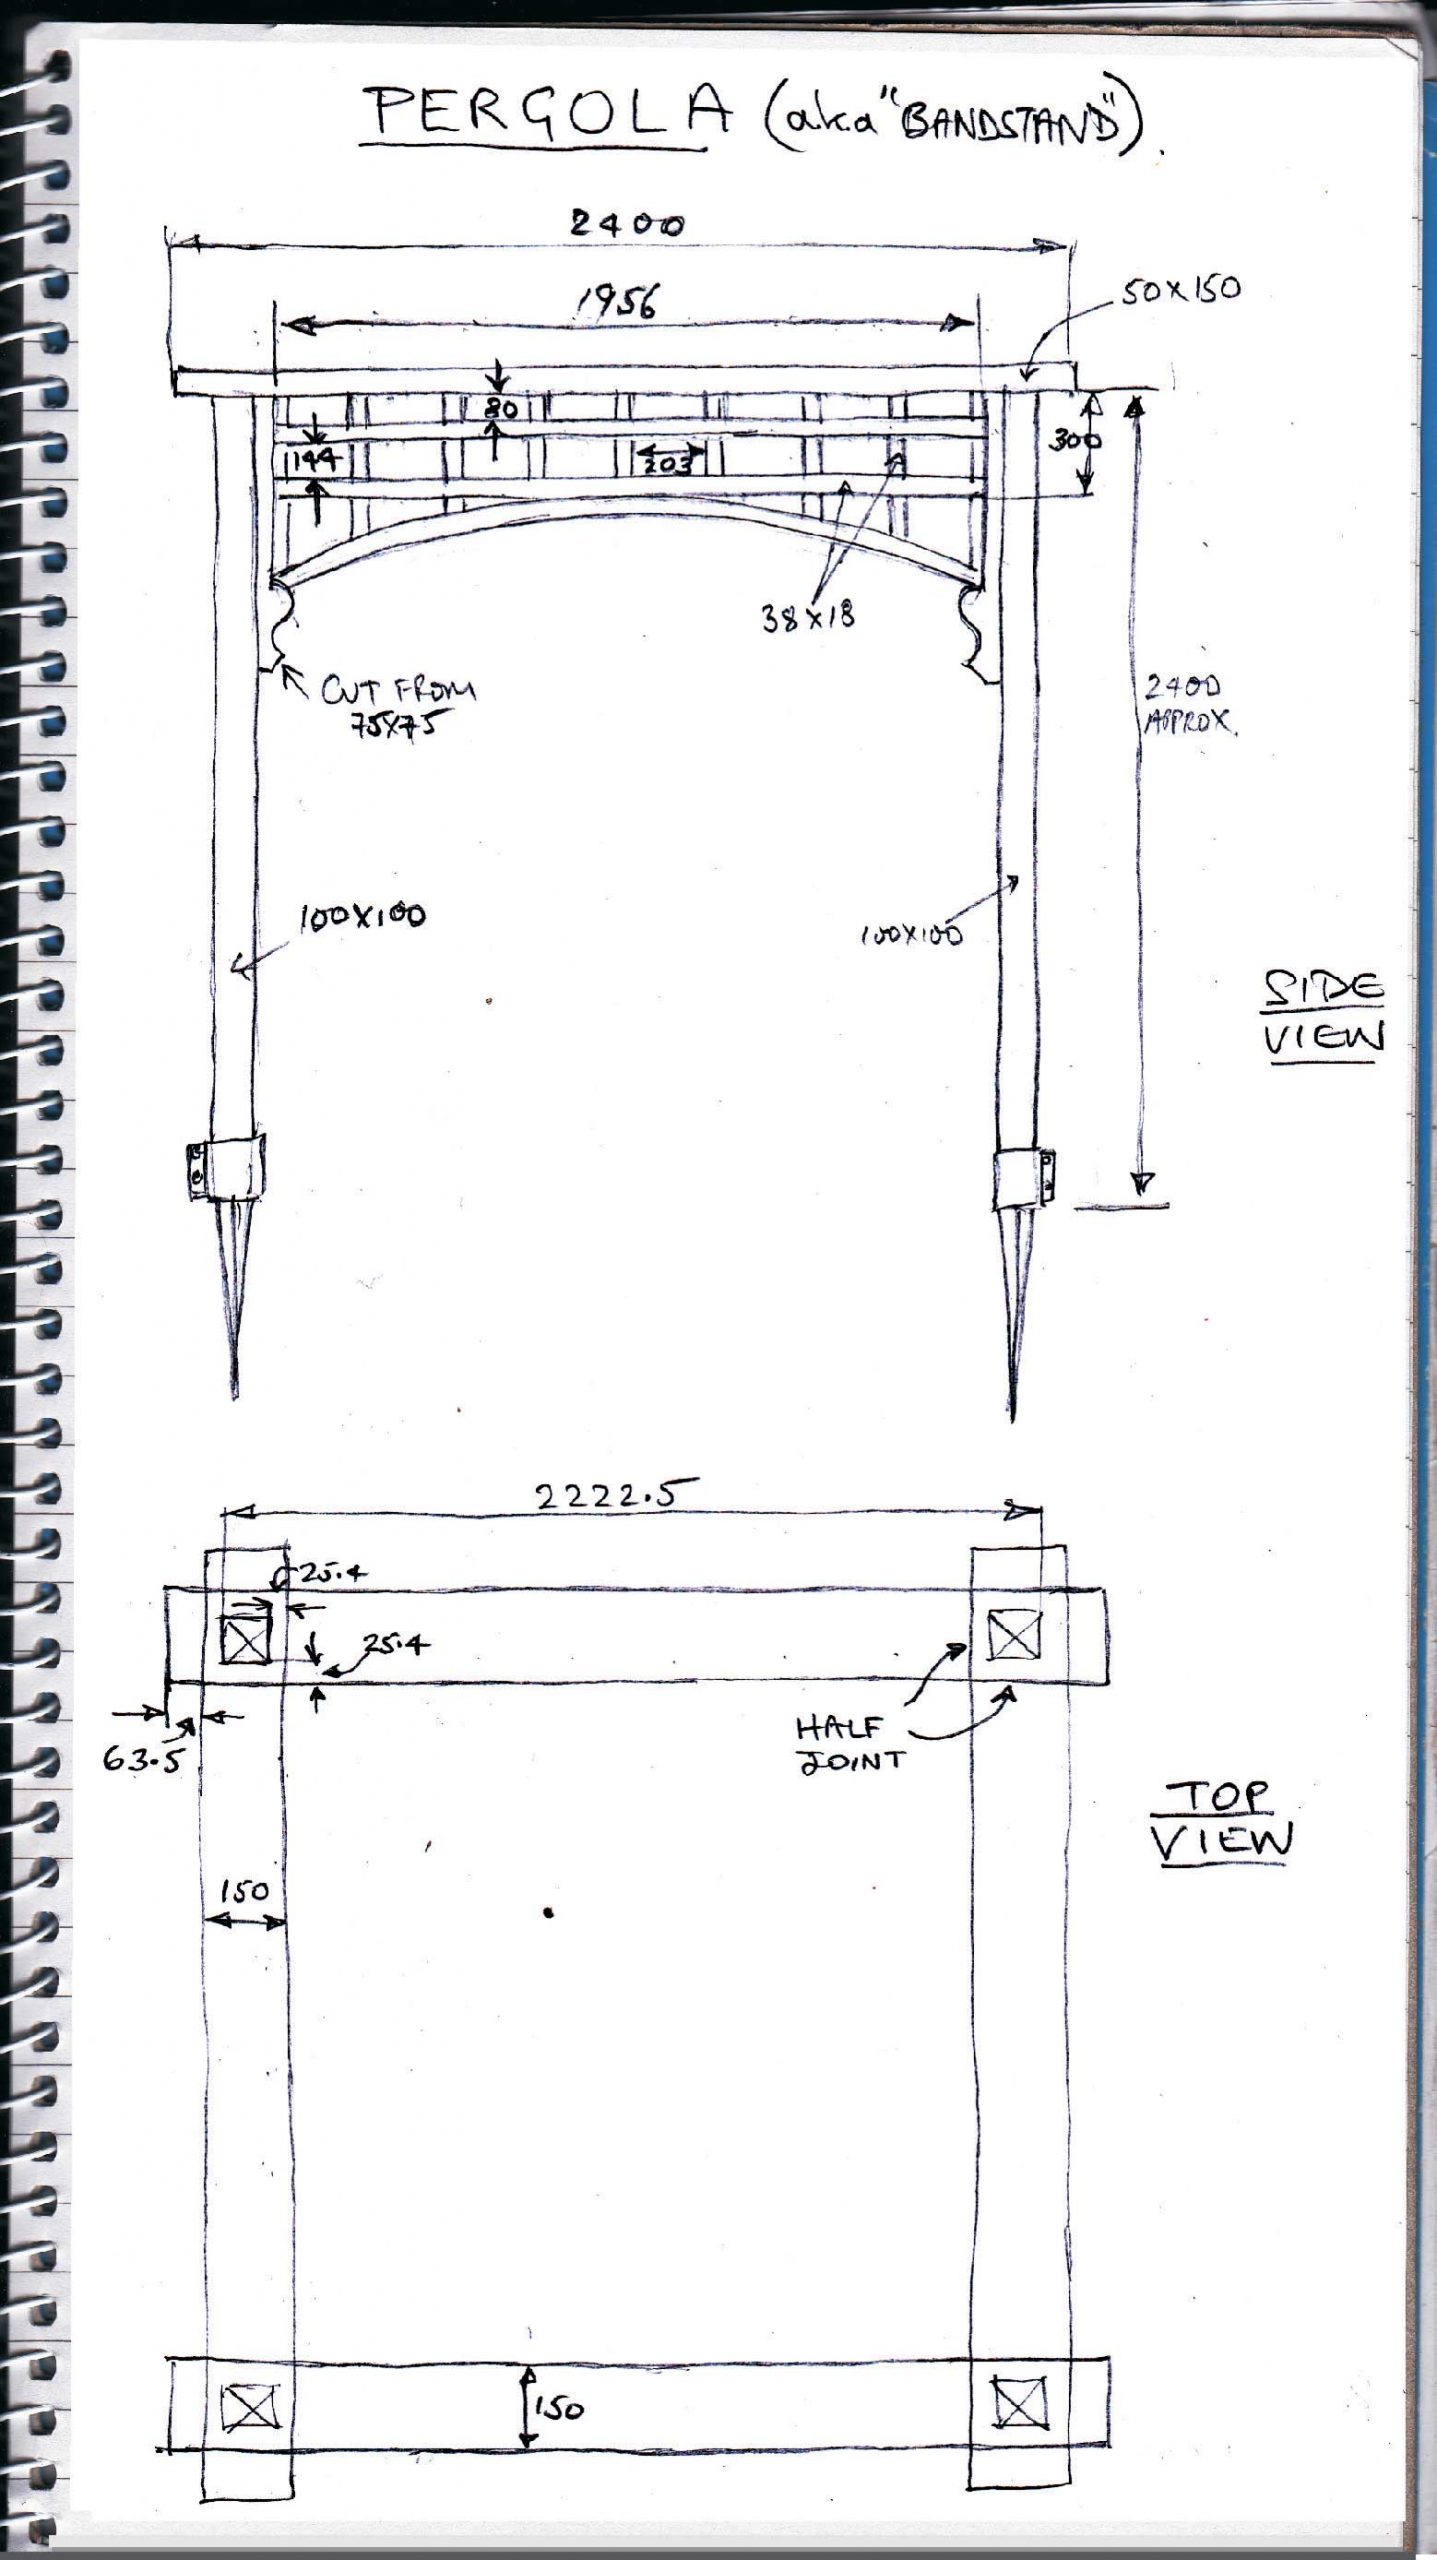
Above: Most projects need to start off with some sort of sketch design in conjunction with some modest surveying of the site with a tape and, perhaps, some pegs to mark out the design. This sketch doesn’t show the pagoda roof as I hadn’t thought of doing one at the time of this drawing. Most times, a design develops as you go along!
Having decided on the dimensions, the first step is to hammer in the Metposts I like to use Metposts as they are quick and easy(ish) – you don’t need to dig a hole which would make a mess where the fixing is into grass. Also the Metpost keeps the end of the post above ground which should increase their life. I’m not sure the “Metposts” are actually “Metposts” they are, however, galvanized which is essential in my opinion.
I start them off by making a narrow hole as deep as possible where the Metpost is going to go using a long cold chisel and deepen it with a long poited crowbar. I use a spirit level to check the hole is vertical. This will get the Metpost started and shift any stones near the surface. I then put in the Metpost with a short piece of post in the top to provide a surface to hammer. Tap it down about two thirds of its length with a large hammer, constantly readjusting it to vertical as you go. At the two thirds point it has reached the point of no return so finish it off with a sledge hammer. There is always a little play available in the socket if the Metpost is a few degrees off vertical.
Then I drop in the four 100 x 100 posts and start setting them vertical. To do this, I measure their distance apart at the base then G-clamp a piece of wood between the posts about halfway up. I adjust the clamps until the distance between the posts at the level of the horizontal piece of wood is the same as that at the base and using a spirit level ensure that the horizontal piece of wood is truly horizontal. I then push the posts from side to side, allowing them to pivot where they are clamped until the posts are vertical. I then clamp a diagonal piece of wood to ensure everything stays in place. I repeat this procedure for all four sides. If I am running out of G-clamps, I put a temporary screw in and liberate the G-clamp.
Now I measure from the horizontal pieces of wood to the tops of the posts. I take the shortest post as my pattern and then I mark the other three posts to that measurement, climb up a pair of steps and trim the posts with a hand saw (or easier but longer, take the posts down and trim them on a Workmate).
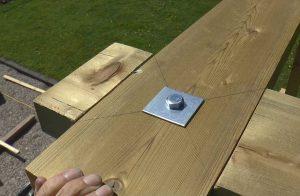
Next, I mark out half joints on the 160 x 50 top beams, make saw cuts to the right depth at about 20mm spacing and chisel out the waste tidying up with a rebate plane where necessary. I put two opposite beams on the tops of the posts and secure them with four off-centre wood screws (so they won’t get in the way of the coach screw main fixings). I then put on the remaining two beams. I secure them by drilling 10mm pilot holes about 75mm deep in the centre of each joint and spanner in 10 x 150mm hex-head coach screws with a large square washer under each head.
Getting the uprights vertical
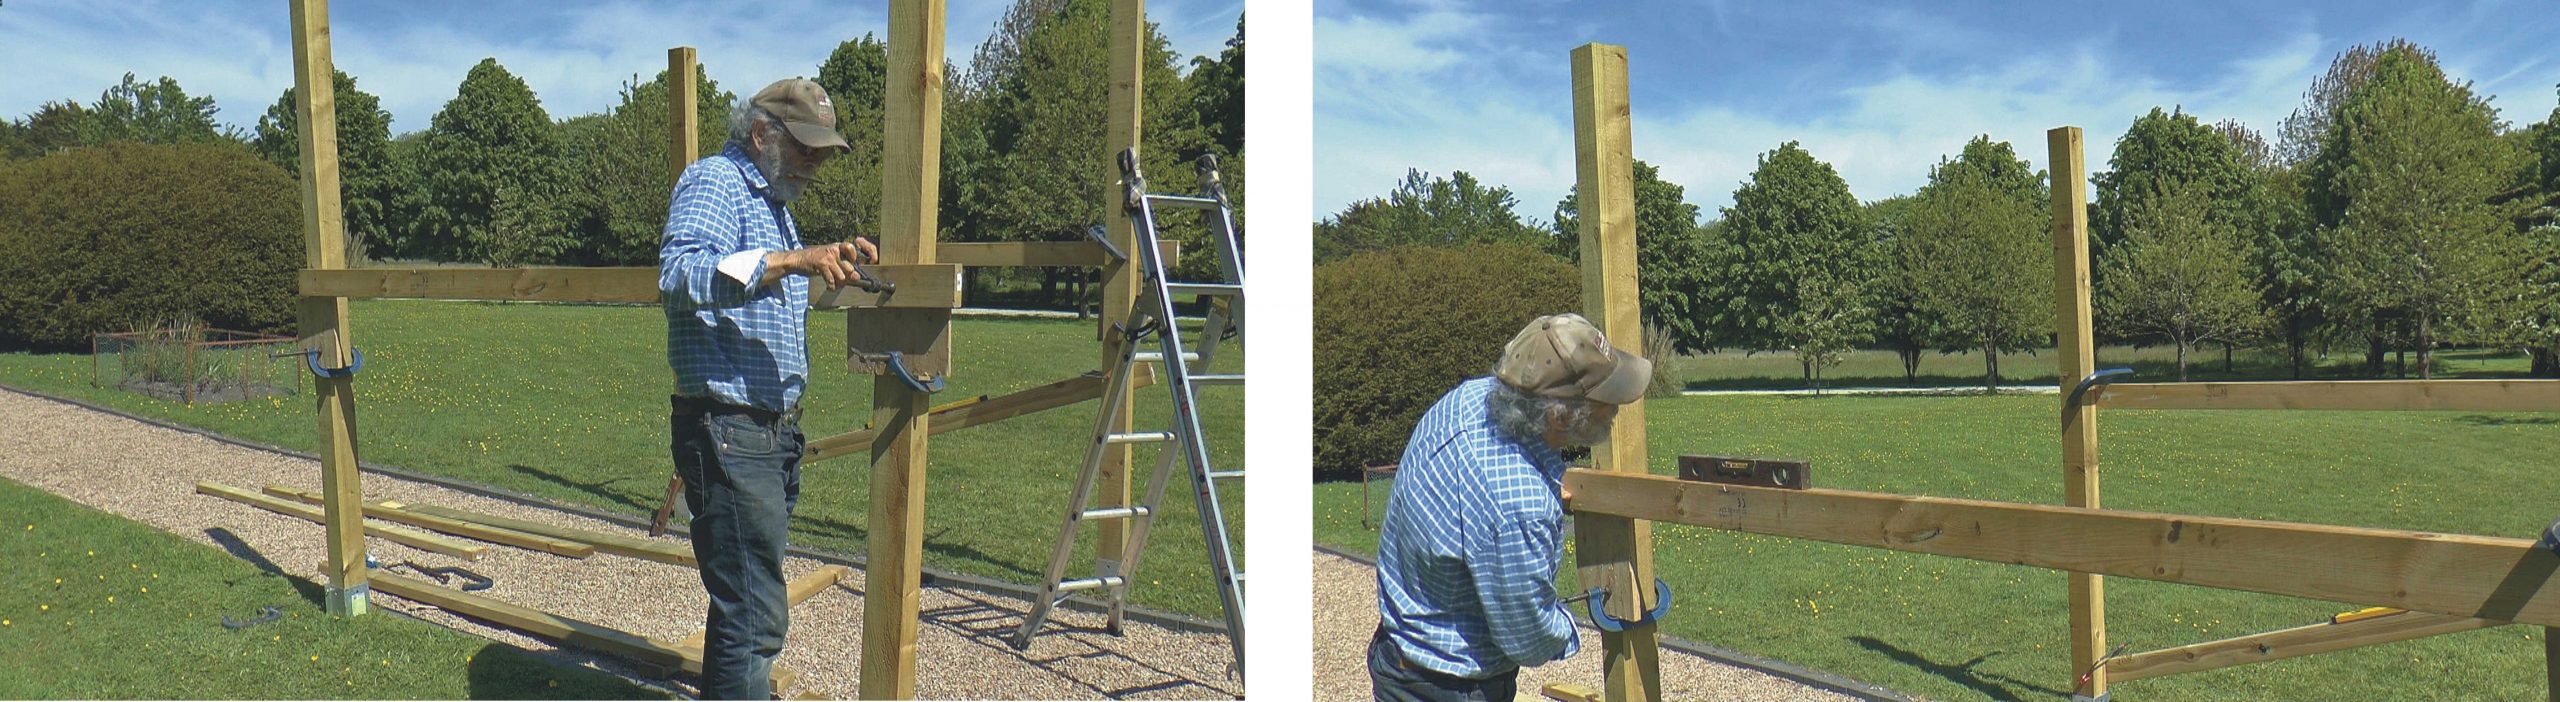
Above, left: Link uprights with cross piece. Make sure uprights are same distance apart at base and cross piece. Above right: Raise or lower cross piece to be level.

Above, left: Get diagonal piece ready and push uprights until they are vertical. Above right: Clamp everything up tightly (or put in temporary screws). Do on all four sides. Measure from cross pieces to mark where upright tops need to be trimmed.
Cutting half joints in the top beams
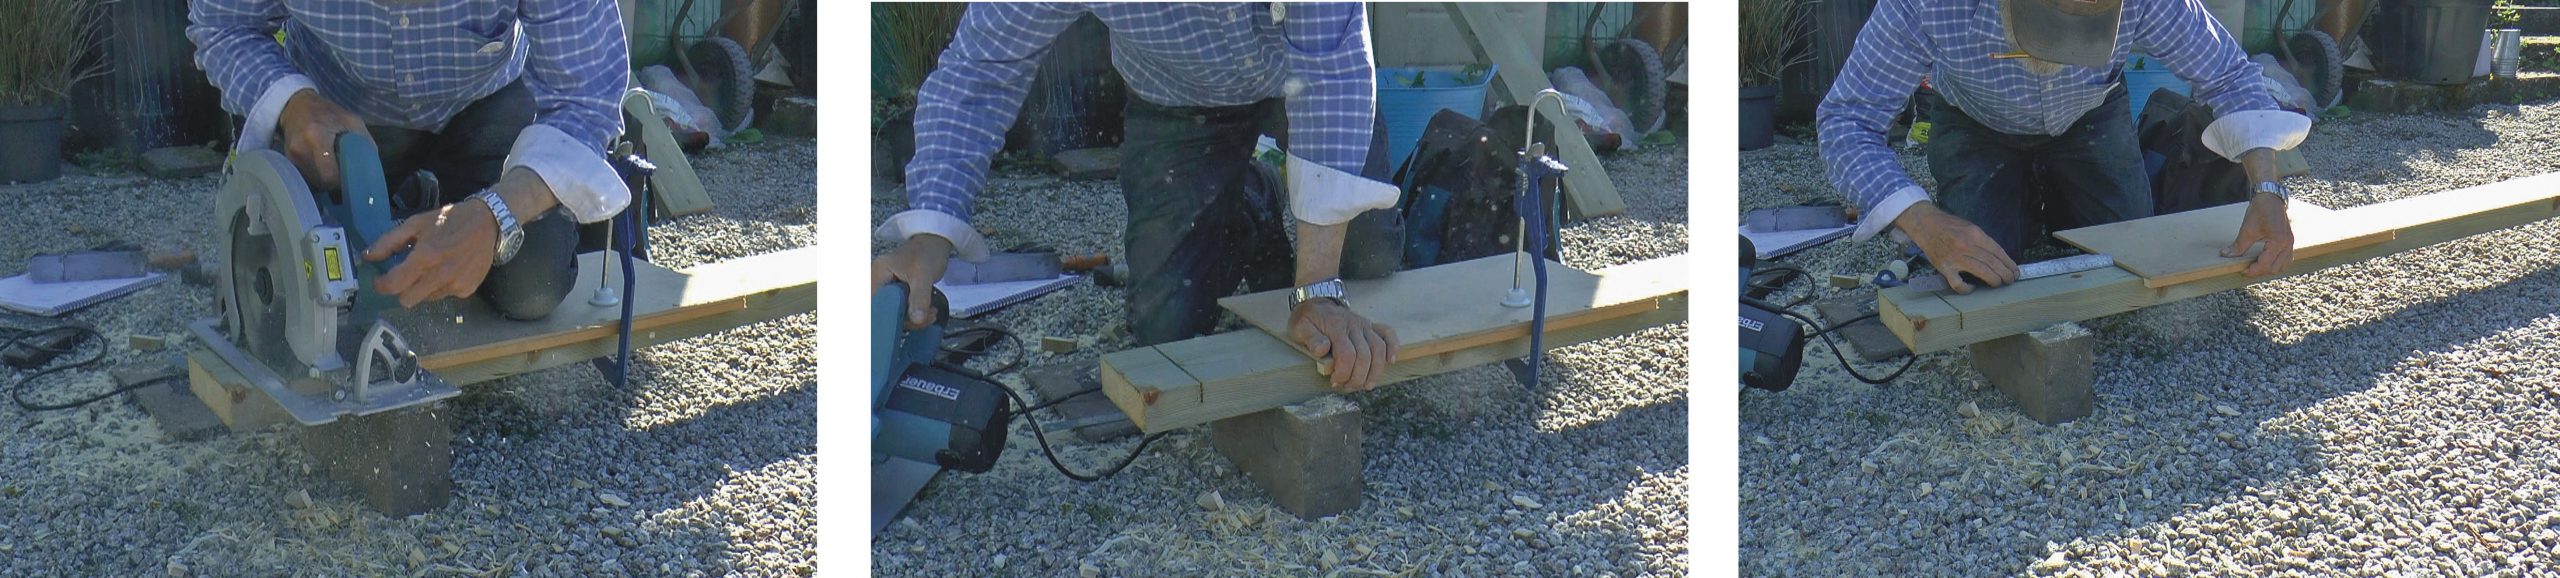
Above, left: Clamp a guide in place and make the first cut (to half the depth of the wood). Above, centre: Move the guide by the width of the wood less about half the width of the saw cut (to allow a small clearance). Above, right: Measure from a pencil line drawn against the guide in its first position
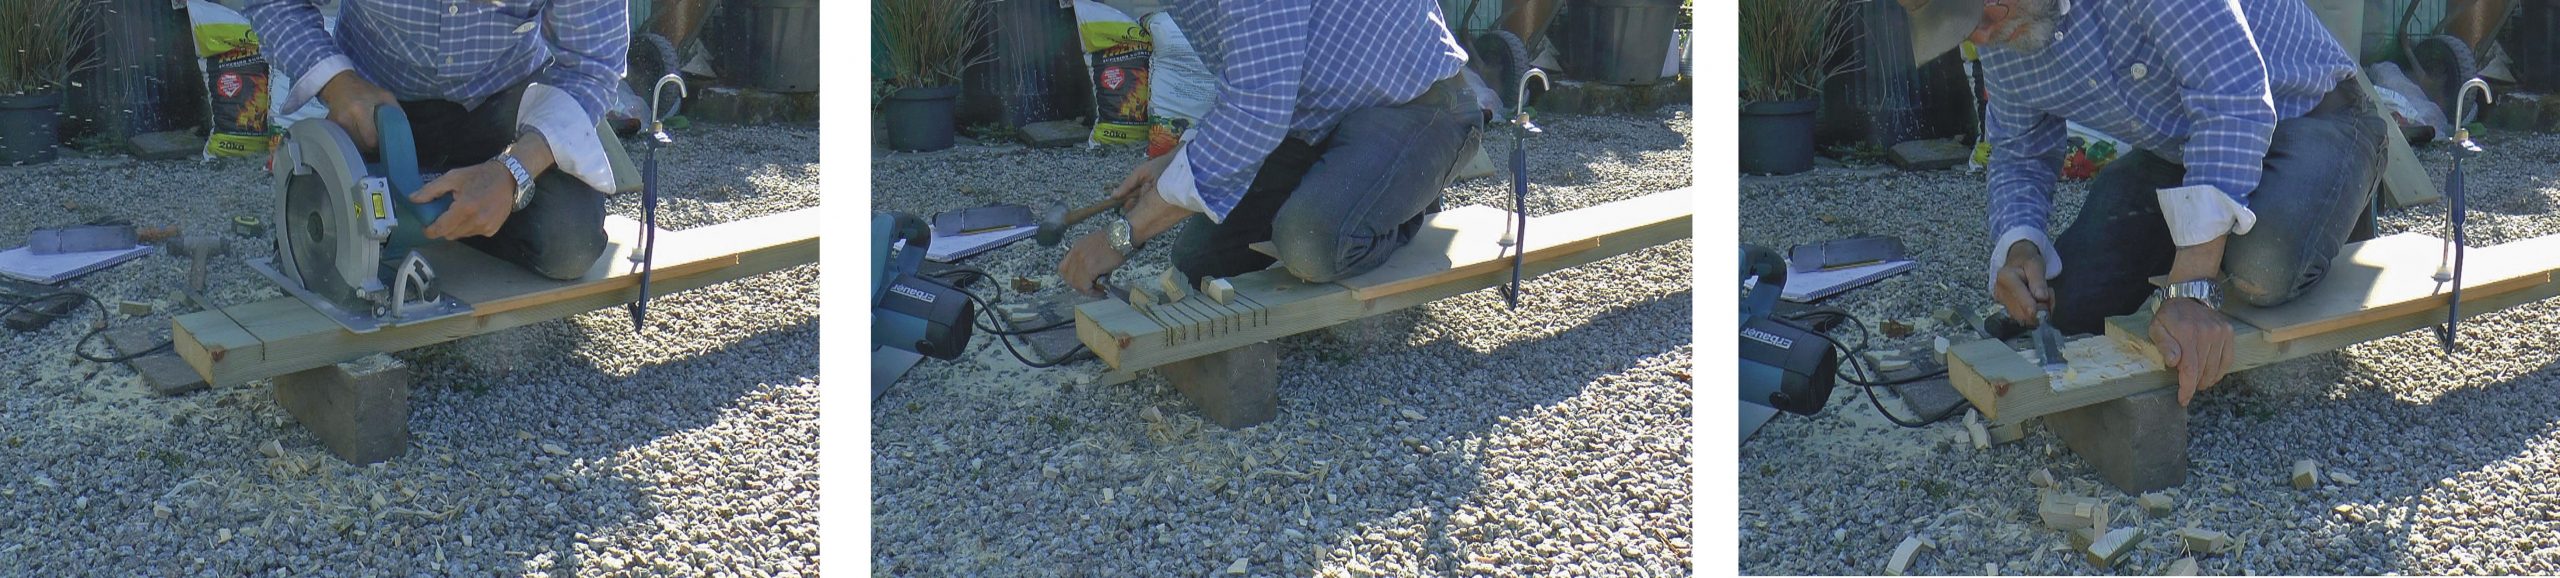
Above, left: Make the second cut against the guide then more cuts, freehand, between the first and second cuts. Above, centre: Chop out the waste from both sides to avoid splitting off wood below the line. Above, right: Get the surface as clean as possible…
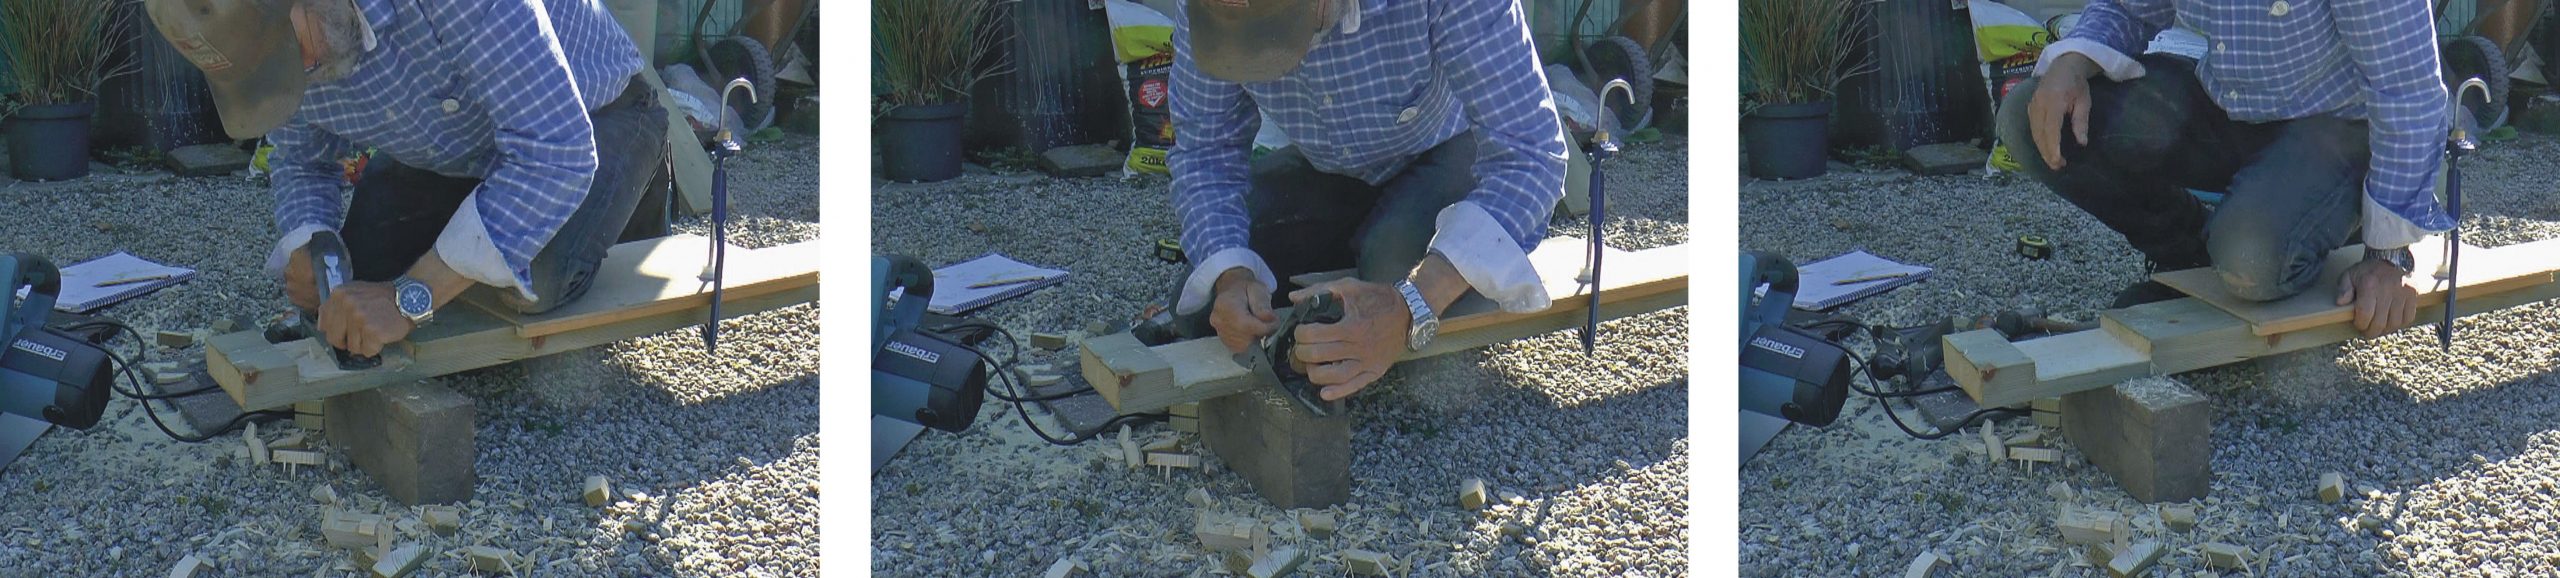
Above, left:: Then finish off with a rebate plane. Above, centre: Plane from both sides to avoid splitting off wood. Above, right: Done!
Putting the top beams in place
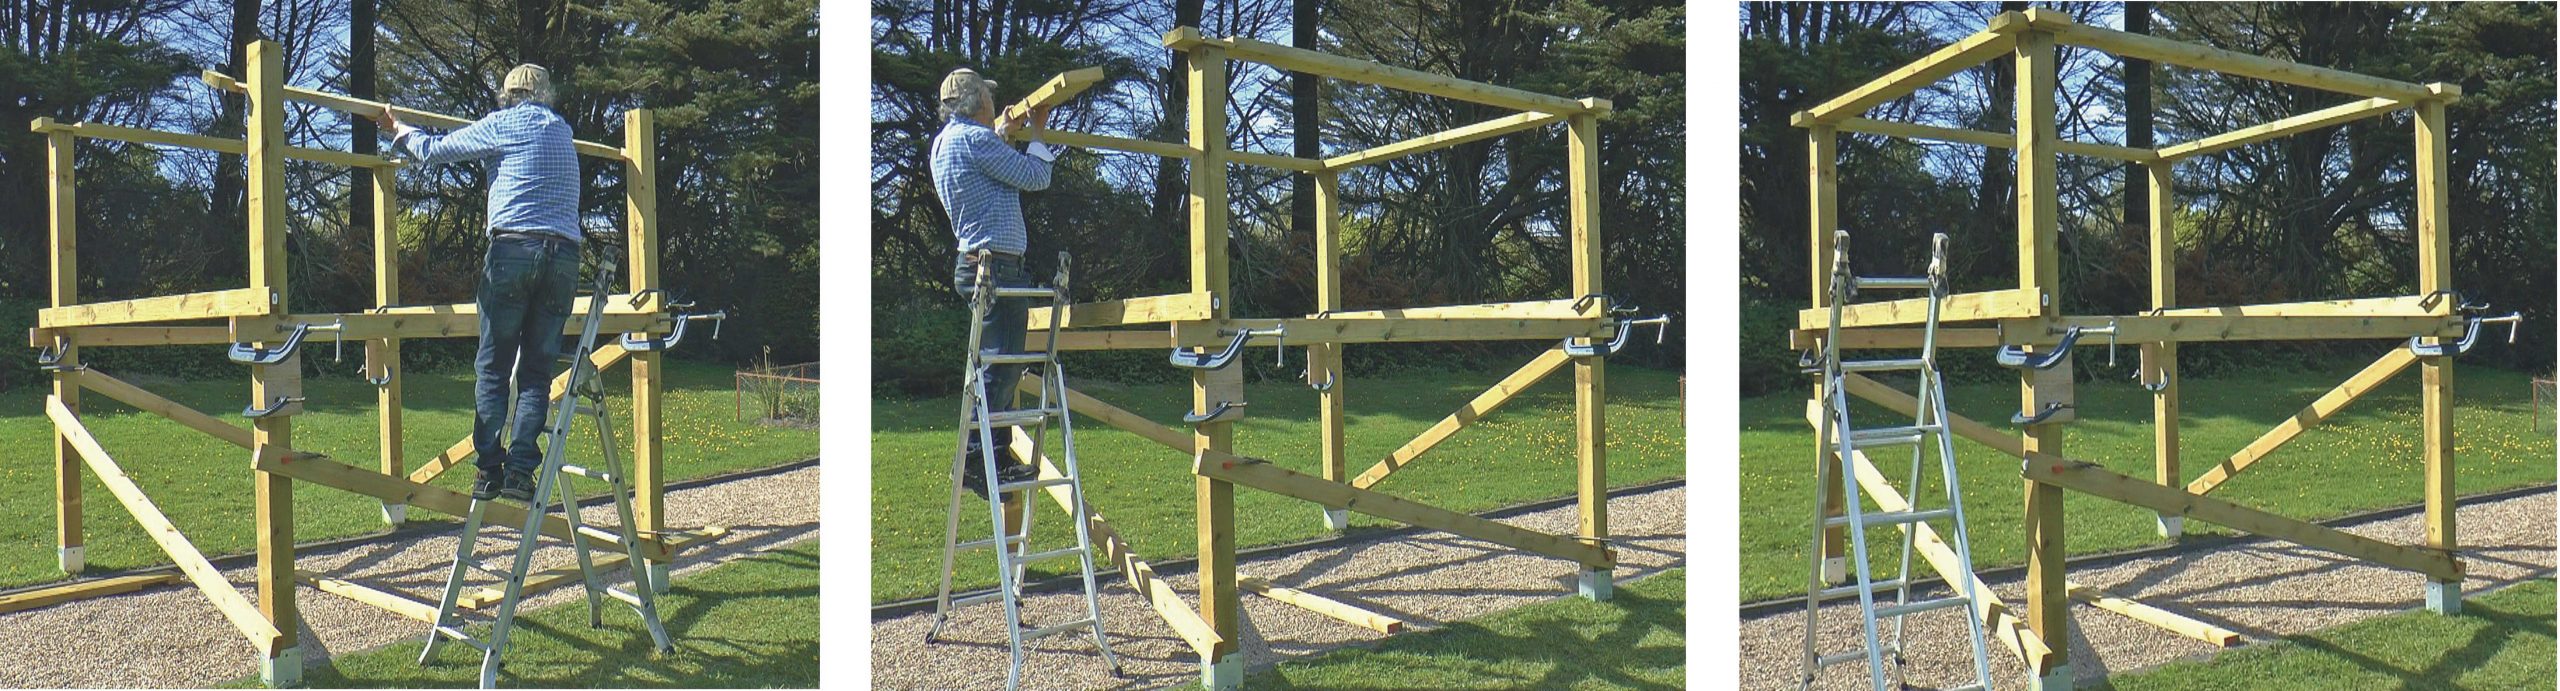
Above: while the structure is still locked together by scrap wood and G-clamps, put two opposite beams on top of the uprights in the correct position and fix them with two off-centre wood screws (to avoid getting in the way of the the main coach bolt). Below: Drop the remaining beams in place. Drill a short 8mm pilot hole for the coach bolt (you don’t need much of a plot screwing into end grain) and enlarge to 10mm through the top beams. Secure with a 10x150mm coach bolt and nice big galvanised washer.
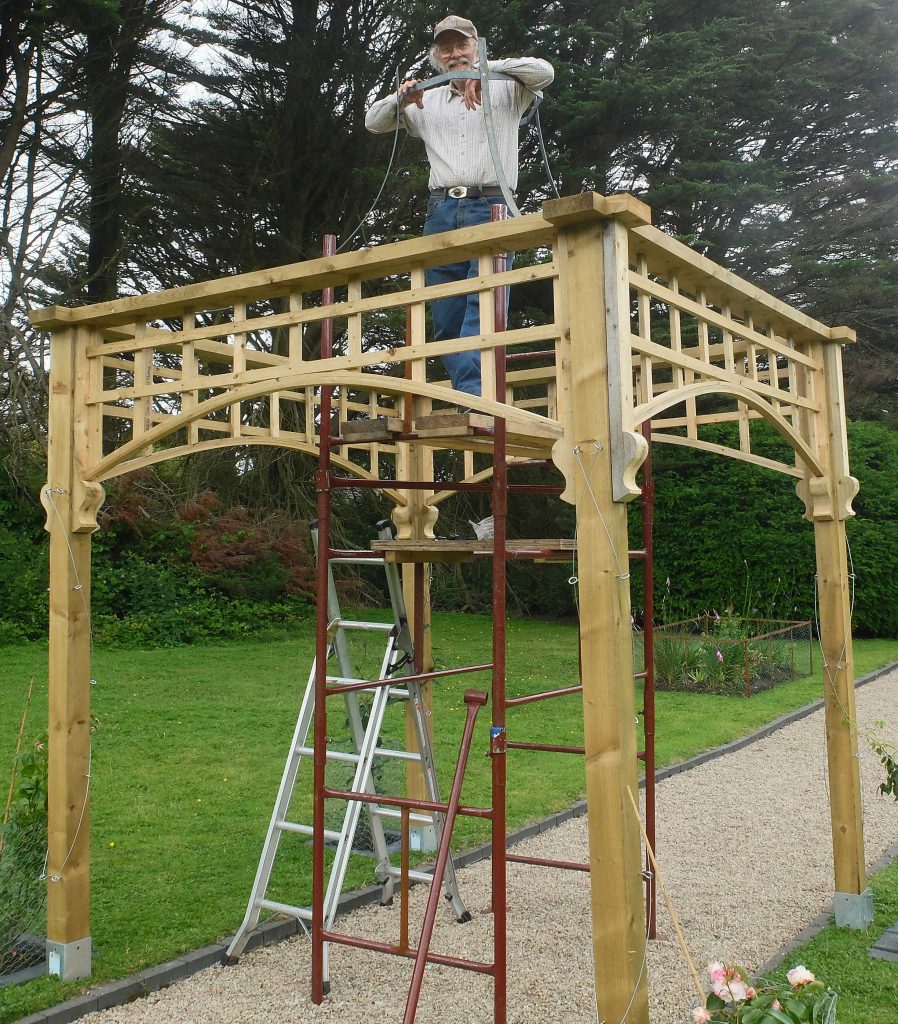
Next, making the arches and the trellis followed by the pagoda roof.