If you’ve got old/classic cars or just like to work on cars when it’s raining (which, let’s face it, in the UK, is a lot of the time!) you are going to need a garage. A timber frame garage is (relatively) cheap, you can quite easily build it yourself if you have a few basic DIY skills, it looks good and lastly, apparently, it maintains a better internal environment compared to brick or concrete in that timber reduces condensation and can absorb moisture providing a buffering effect to conditions which promote the dreaded rust. A good quality timber garage should last over forty years or perhaps indefinitely, if properly maintained (medieval timber buildings are quite common!) Anyway, here’s how I built my 20×18 foot garage for about £10,000.
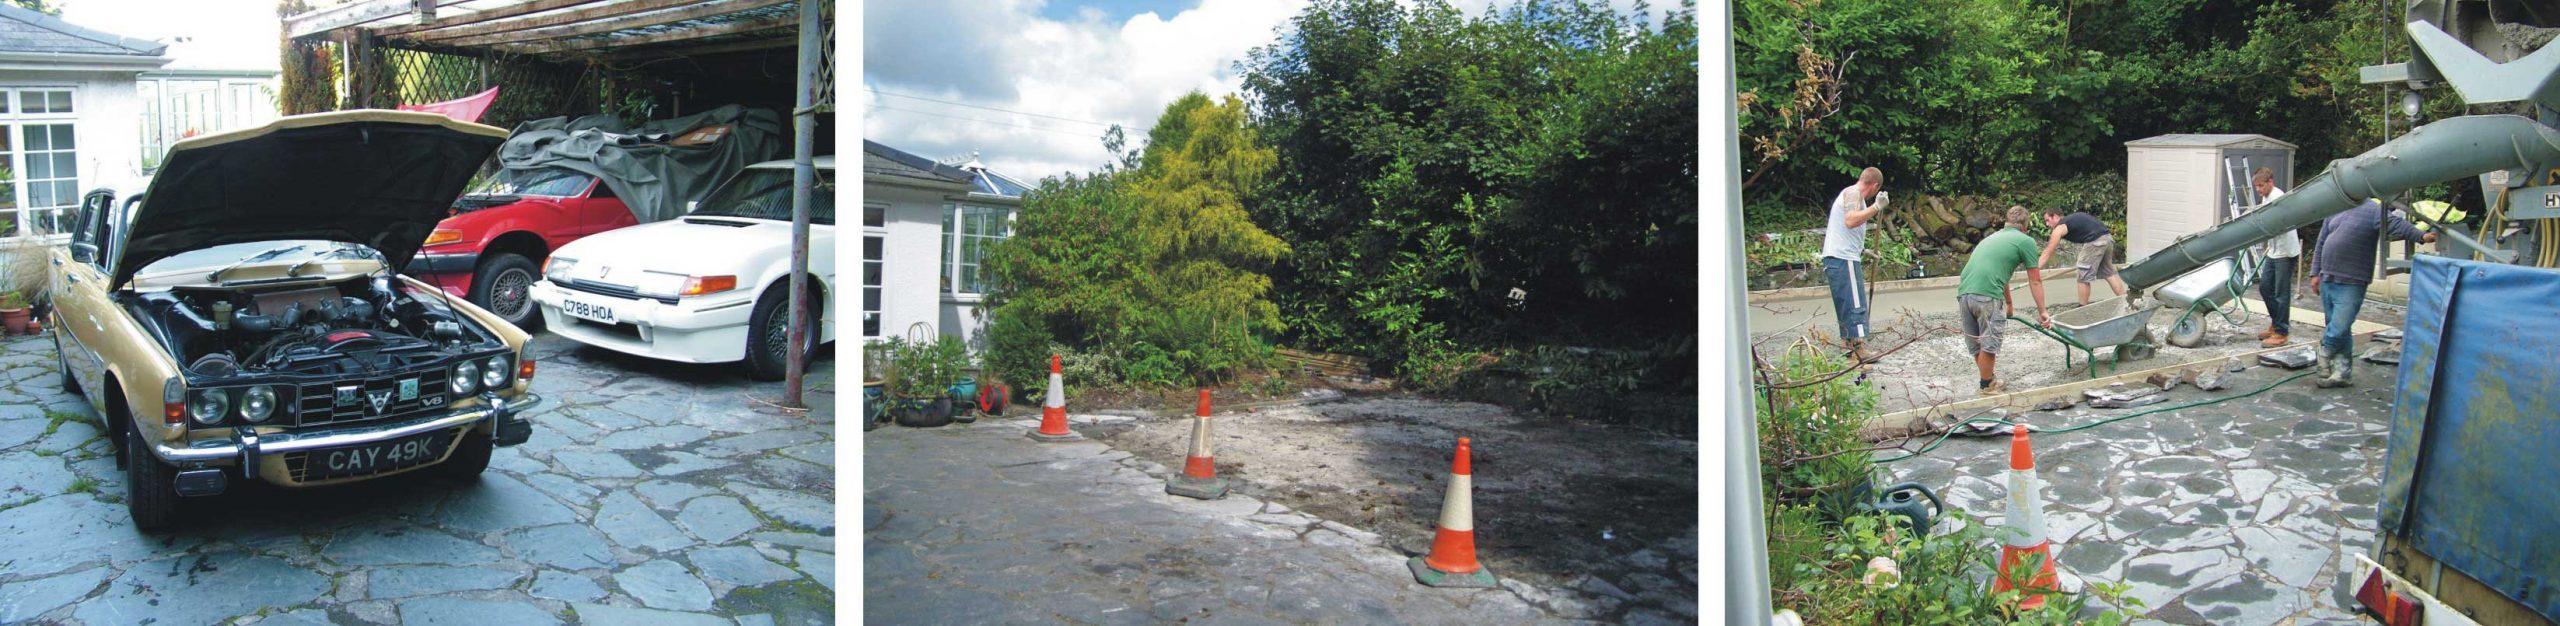
Above, from the left: Although I had done quite a bit of serious work under it, the old car port, which came with the house, had to go! Centre: There were a lot of solid slate slabs to be cleared, (which came in handy elsewhere) and underneath we found very solid hardcore which was an ideal foundation for the garage’s concrete base. Right: The concrete being poured. I left this job to contractors.
The Beamlock System
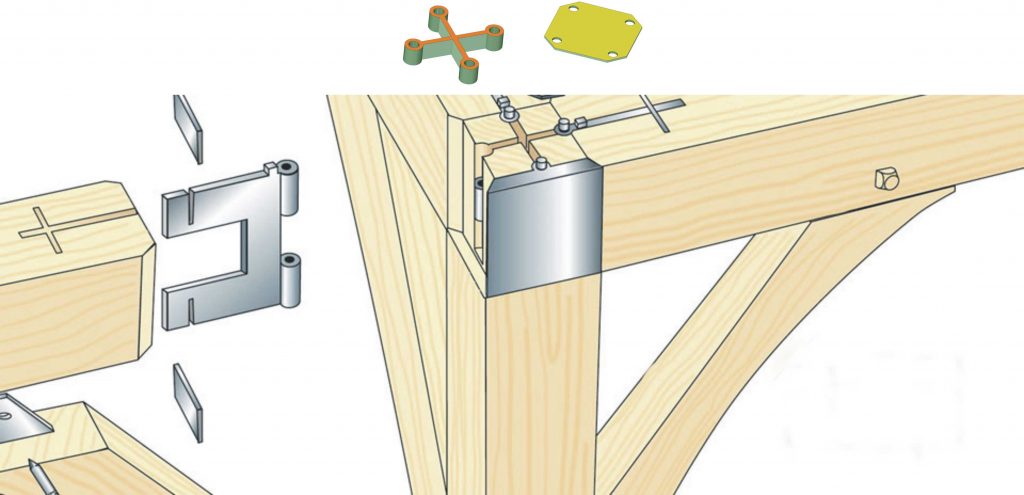
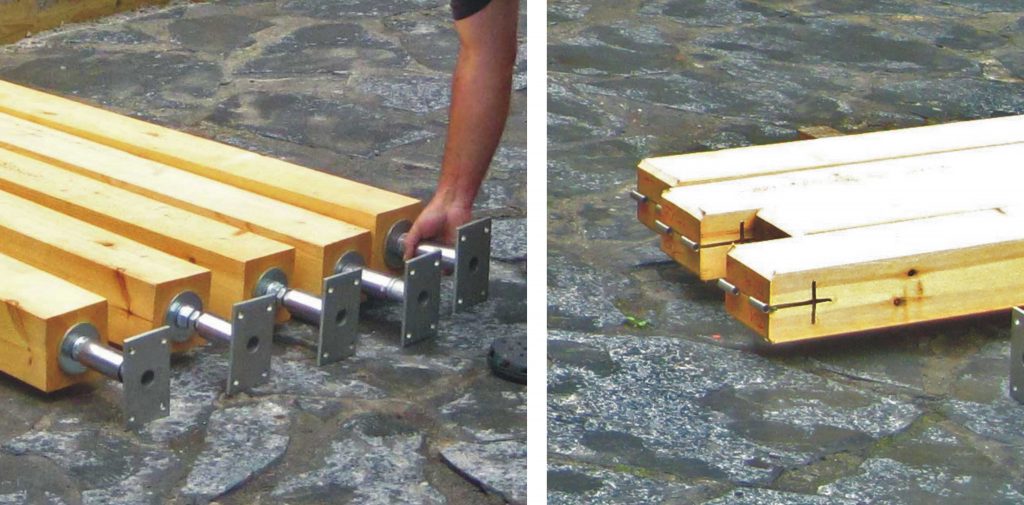
Above: The garage was made using the Beamlock system which enables the frame of a timber garage to be put up very quickly on a concrete base. I bought a pine frame (would have liked oak but it’s very expensive!) The garage comes as a kit with the main frame members cut to size and machines with all the correct holes and slots. The roof trusses are cut to size with a notch already cut to fit over the wall plate. The larch cladding and the roof battens came in random lengths and needed to be cut to length as required. (I sourced the doors separately.)
Here’s how the Beamlock system works (see pictures above). The uprights are machined to take a spider (the green and orange piece in the diagram) which fits in halfway down the slot. The lintels have metal pieces locked into their ends which, when inserted into the uprights, can be locked in place by pins passing through these fittings and the spider. The pins also pass though a plate (yellow/green colour in the diagram above) which sits on top of the joint. Elegantly curved wooden bracing pieces fit into slots on the uprights and lintels and are screwed into place to ensure rigidity. This particular version came from Bolton Buildings, Sussex.
These are some tools you will need.: an SDS masonry drill and bits (a big, cheap mains operated job), a re-chargeable drill/screwdriver (two drills are more convenient, one for drilling, one for driving), a selection of spirit levels (Screwfix do a set), a chalk line, a measuring tape at least 15m as well as a selection of DIY tools such as hammers, chisels, spanners and G-clamps.
Construction
The first thing to do is to mark out a rectangle on the slab that will enable the uprights to be accurately positioned. The instructions which came with the kit should say what the size should be. The slab should be at least 6” bigger than the exterior dimensions of the garage. If the slab is not square (ie the corners are not 90 degrees) you will want the front of the garage to be parallel with the front of the slab at least. Knock some masonry nails in about half an inch deep to mark the front edge and snap a chalk line stretched between them to mark a line.
I made up a large right angled triangle with straight bits of 50x25mm softwood in the proportion 3,4,5, so 6,8,10 feet should do it. I use this to define the sides and then finish with the back. The check then is to measure the diagonals. If they are not equal, you have to check to see where the error is.
Assemble two uprights and a short lintel flat on the ground, (don’t forget to slide on the covers for the feet!), get them upright in the right position on the base and brace them in position with a couple of pieces of wood and a pair of large G-clamps. I did the same with another couple of uprights and a lintel. I then lifted up one end of a long lintel and hung it from the existing short lintel with a luggage strap. This enables the other end to be easily lifted up and pushed into the slot in the other upright. I then went back to the first end, and manoeuvred the lintel in to the joint, removing the strap as I went. (I say “I” but this is a two-man job and at least half if not more of the heavy lifting was done by my friend John!)
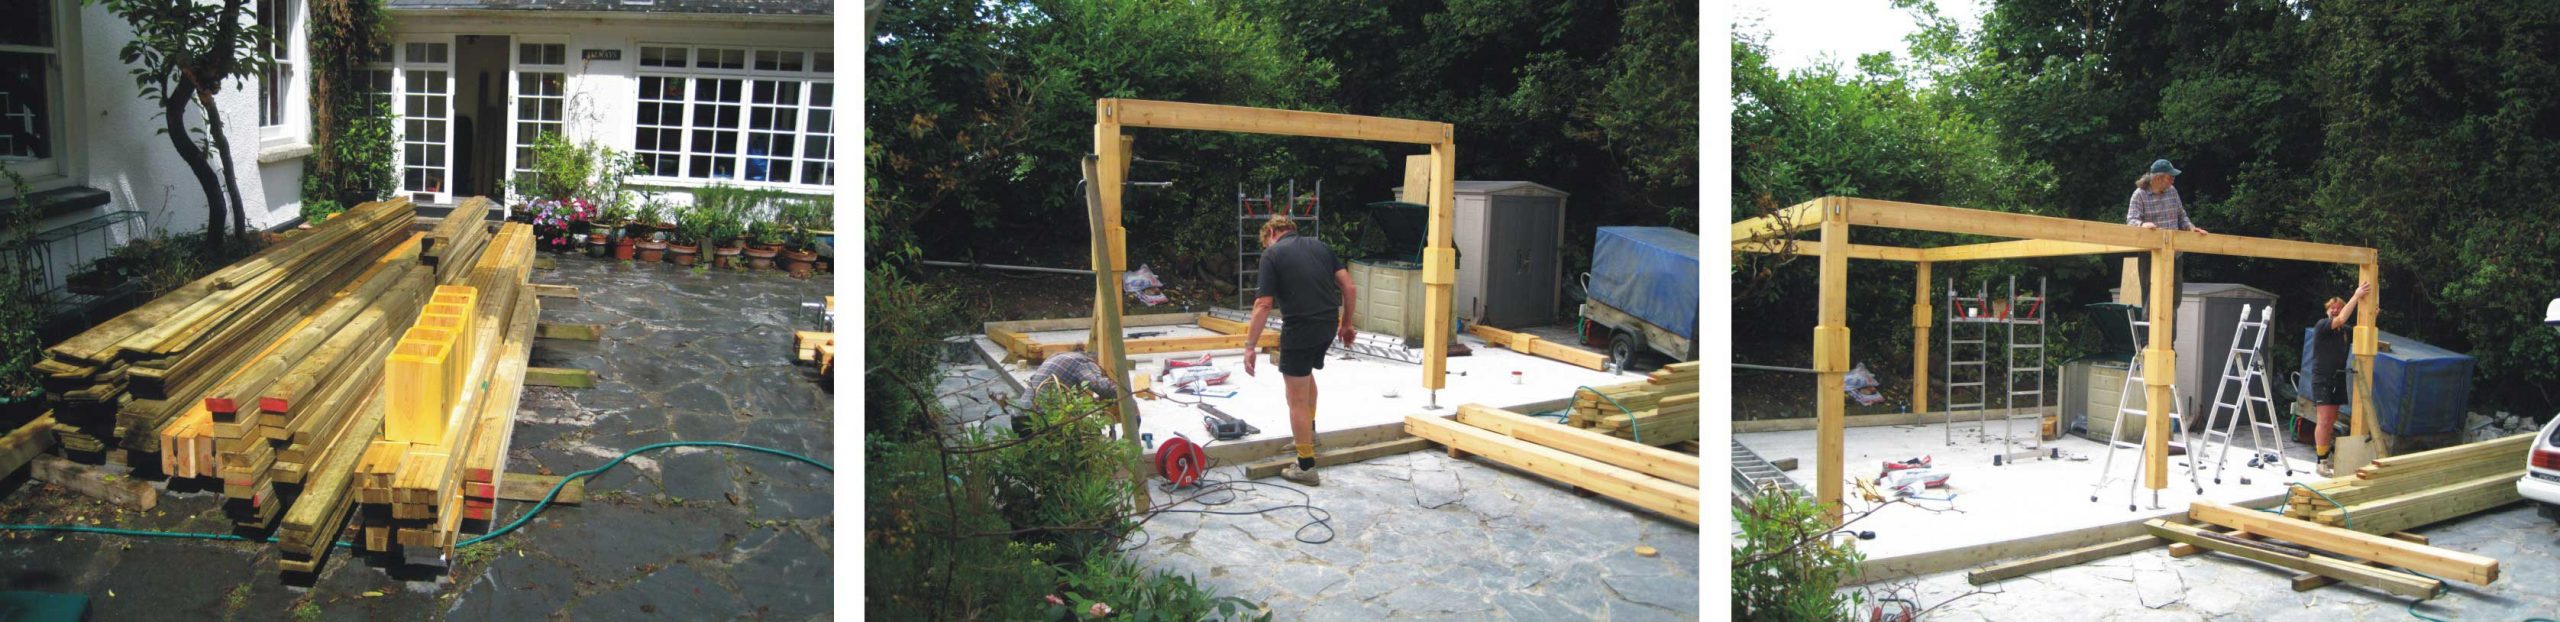
Carry on adding uprights and lintels until they’re all in place. Then get the bases into the correct position. Check the uprights are upright with a large spirit level. Adjust the feet to make sure the lintels are all horizontal. Check the diagonal measurements on the top and bottom. Check and re-check until you’re confident it’s as good as it’s going to get. Then mark the holes for the base-plates and move the whole structure slightly to make room for drilling the holes for the anchors. I drilled a small hole first to make sure the big SDS drill drills in the right place. Drop the anchors into the holes and manoeuvre the base over the studs and apply a washer and nut.
The covers for the adjustable feet (previously held out of the way by resting them on a nail) can now be let down into place. They should be secured about 6mm above the concrete so they don’t soak up moisture. Finally, the diagonal braces can be slotted in and secured.
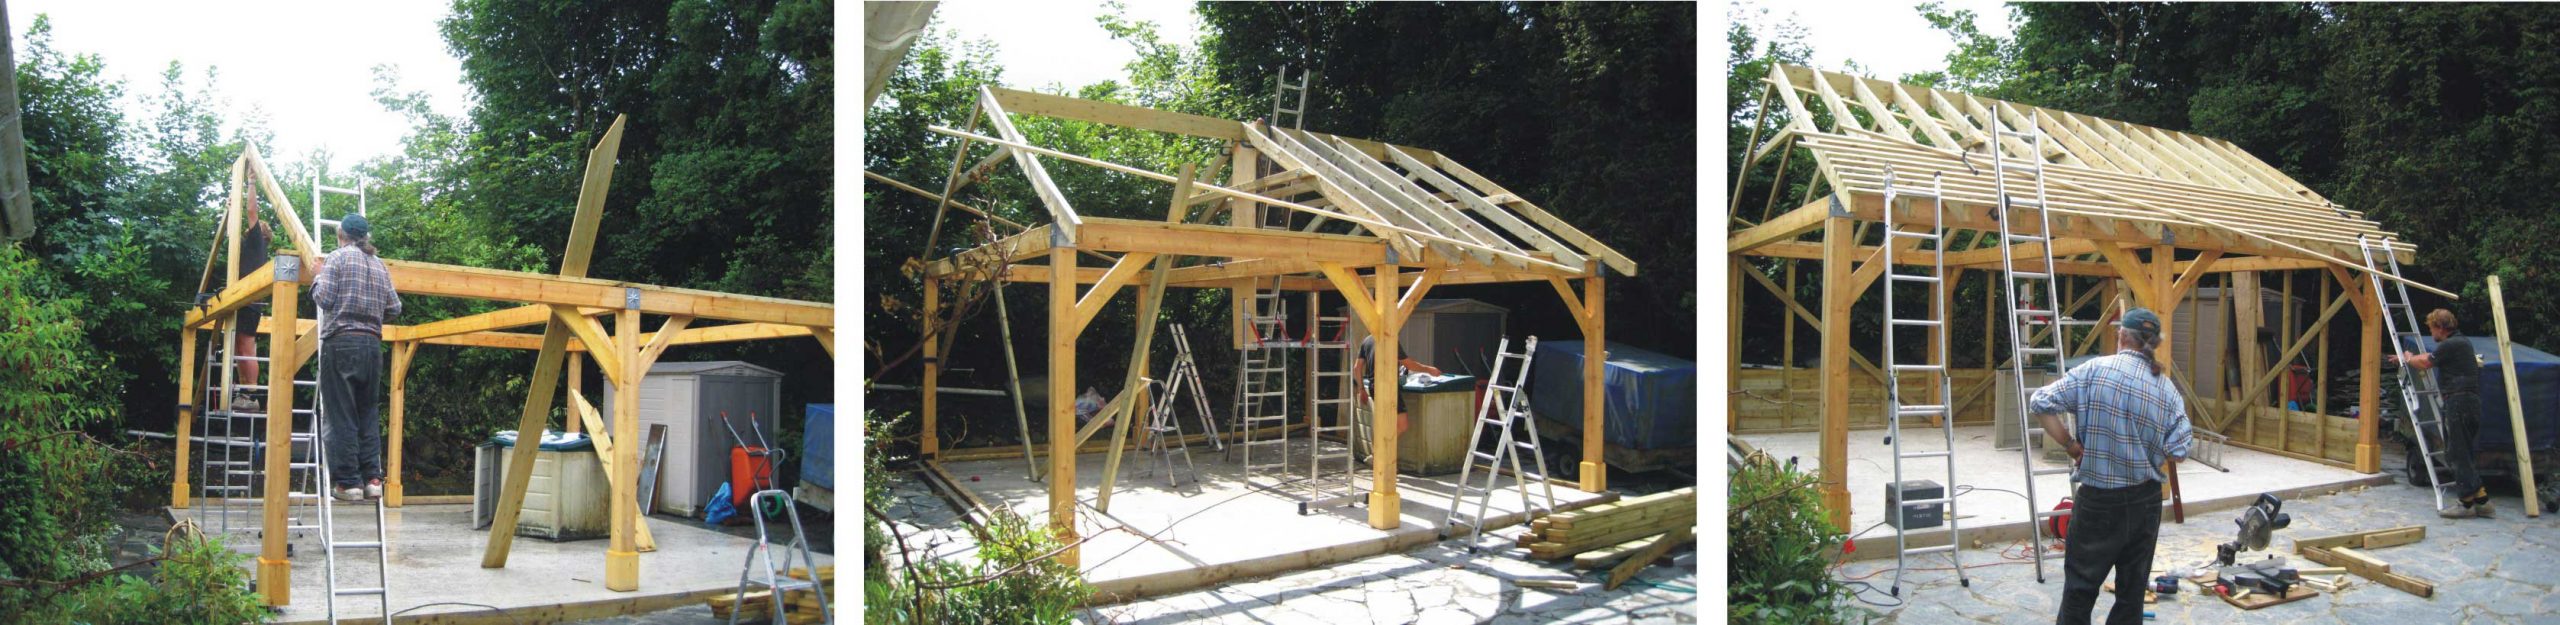
Next was the roof (see above).The rafters come pre-cut with a notch to fit over a wall plate of 50 x 75 mm (which needs to be nailed to the frame lintel first) and a mitre to fit against the ridge board. So that makes life a lot easier! The ridge board comes in two pieces with a pre-cut scarf joint.
To get things going, we used two pieces of 18 mm ply with slots cut in one end, G-clamped to the gable end frame lintel to support the ridge board. A plumb line needs to be dropped from the top of the board and the board adjusted until the plumb bob hits the centre of the structure. The end and centre rafters can then be fixed in place. Care needs to be taken to ensure that the distance between the rafters at the ridge is the same as at the wall plate. Also these rafters should be chosen for straightness and lack of twist. The rafters can be fixed at the wall plate with nails skewed in from both sides but at the top, perhaps it might be better to use long 6 mm screws to avoid disturbing the initial setup. Braces were then bolted to the rafters to lock them together forming the simplest of structures (but which the designers of the kit deem perfectly strong enough once some diagonal braces have been put in place).
Now one piece of ply was removed and fitted at the other end of the building to support the other half of the ridge board. Before continuing, a plumb line was again dropped from the end of the gable and a couple of temporary braces used to move the gable end so that it was flat with the side of the building and not leaning out or in. Then the other half of the ridge board was fitted into position and short pieces of 18mm ply were screwed on each side of the scarf joint to secure the two halves together. Then there are what seems like hundreds of battens to be nailed on. The battens were 48mm (1 7/8”) wide and the separation (gap in between) was 92mm (3 5/8”). Make a couple of spacers to get the gap consistent and use two nails (on the diagonal) for each rafter, also stagger the joints.
I would have liked to get the shingles on next to provide a bit of weather protection as soon as possible but they had not arrived yet so cladding the sides was next. The first job is to screw a nominal 4×2” treated floor plate to the concrete between the main frame uprights. Then skew-nail uprights (something like 3 5/8 x 1 7/8” CLS C16 timber) between the plate and the lintel. I put diagonal braces across these uprights but removed them when I clad the interior in 18mm ply.
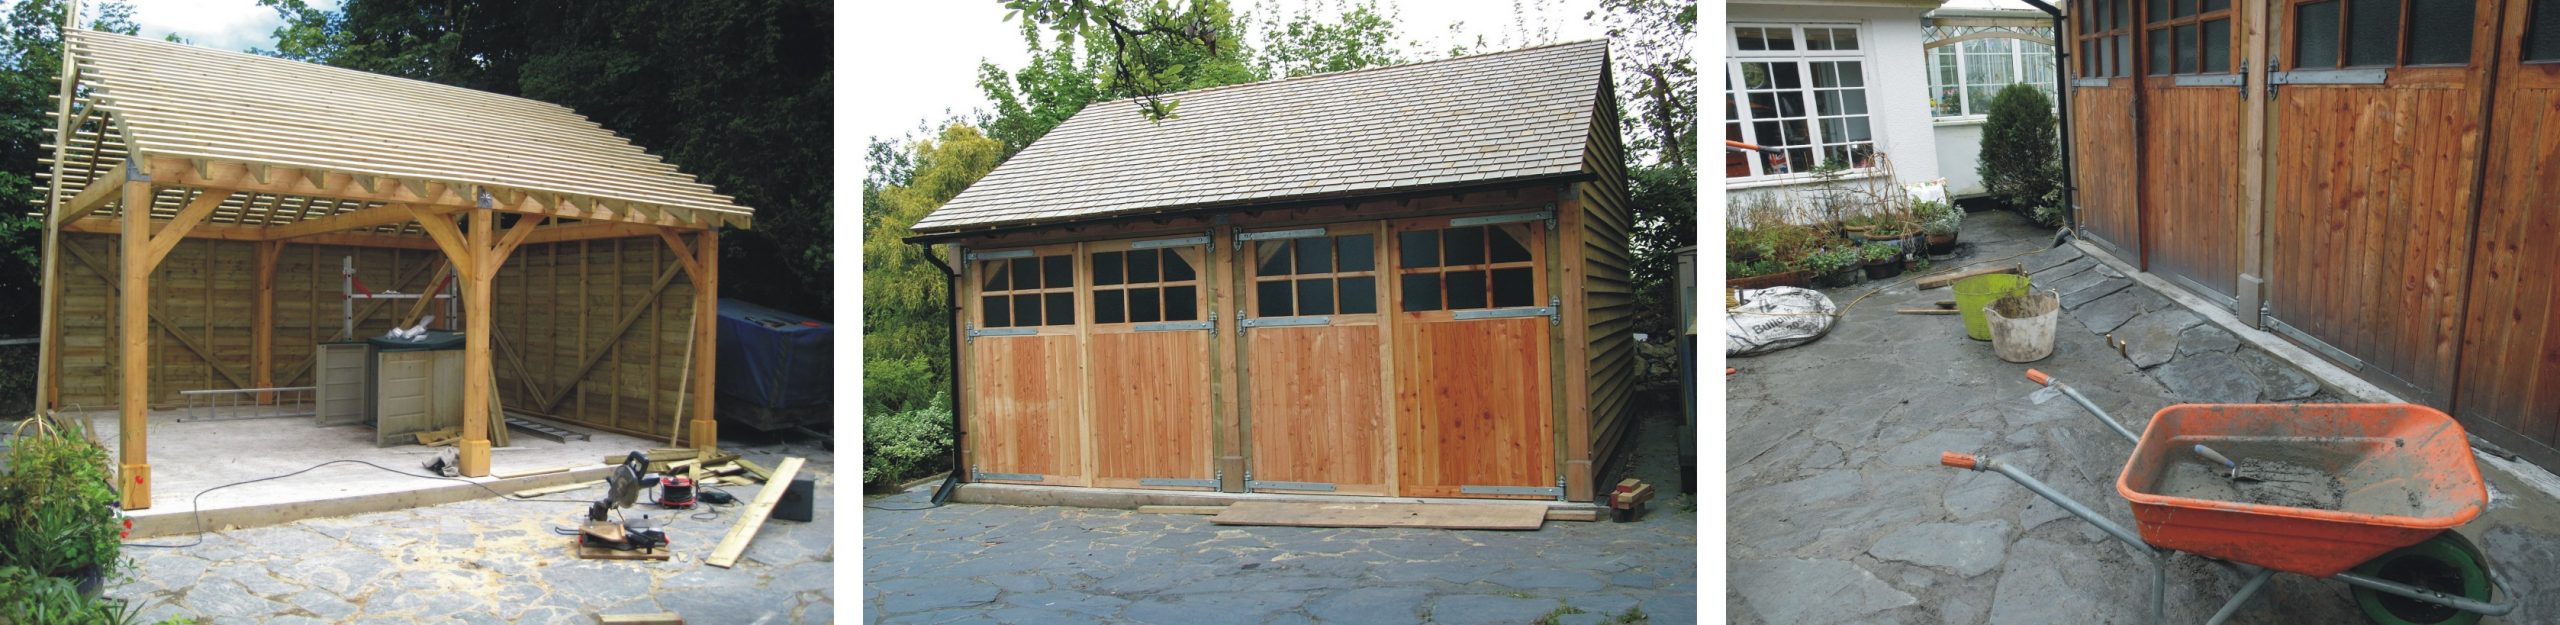
Eventually the shingles arrived and I got on with the roof. These are Canadian but are Eastern rather than the more normal Western red cedar. There is apparently little difference other than they haven’t travelled so far (greener, then!) (This species is to be distinguished from cedar of Lebanon and cigar box cedar neither of which are anything to do with roofing shingles.) Cedar shingles are oily and are very rot resistant. Opinion as to whether and with what they should be treated with over time is divided. So far, I haven’t put anything on. If they deteriorate (after 25 years or so?) it is possible to nail a new set over the old, I believe.
The shingles come in random widths so they need to be selected for each individual position to make sure the gaps don’t line up. At the ends, there will probably have to be some trimming (I took them down to the workshop and used a table saw). The shingles should be nailed in place with stainless steel nails. There are two layers, one directly on top of the other on the bottom row. I made up a gauge to keep the gaps between the rows accurate. At the ridge, I nailed on overlapping shingle capping. So far, the roof has been completely watertight (knock on cedar wood!)
Next were gutters and downpipes. I could have boxed in the ends of the rafters with facia boards and a soffit but I just blocked the spaces between the rafters on the inside with individual offcuts of 18mm ply. I screwed the gutter clips to the ends or the rafters. I like to establish the maximum fall for my gutters that circumstances will allow. That way you have a fighting chance they will be self clearing (although we have so many trees around us that that is rarely the case in practice).
Doors & Interior
In order to hang the doors, a frame needs to be built in each opening and screwed to the uprights and lintels. You can’t really fit the doors directly into the frame because of the foot covers on the uprights. Anyway, the additional thickness makes the construction of the garage look more substantial. I used 4×4” treated timber for the sides and 2×4” for the top. I formed a mortice and tenon joint at each corner but that’s not really necessary.
I had the doors made up by a local joiner. When getting this sort of thing made up, it is a good idea to actually cut pieces of wood (say, 2×1”) to the dimensions you require rather than just quoting measurements, That way there can be no embarrassing mistakes. (Professionals call this measured piece of timber a rod .) I would allow a clearance of 5mm each side, 8mm between the doors and 8mm top and bottom (Winter clearances). If the doors come a bit too big, they easiest solution will be to take off the frame and adjust it with a circular saw. (So if you are a little unsure, don’t glue the mortice and tenons!) The final job is to apply pieces of 2×1″ as door stops.
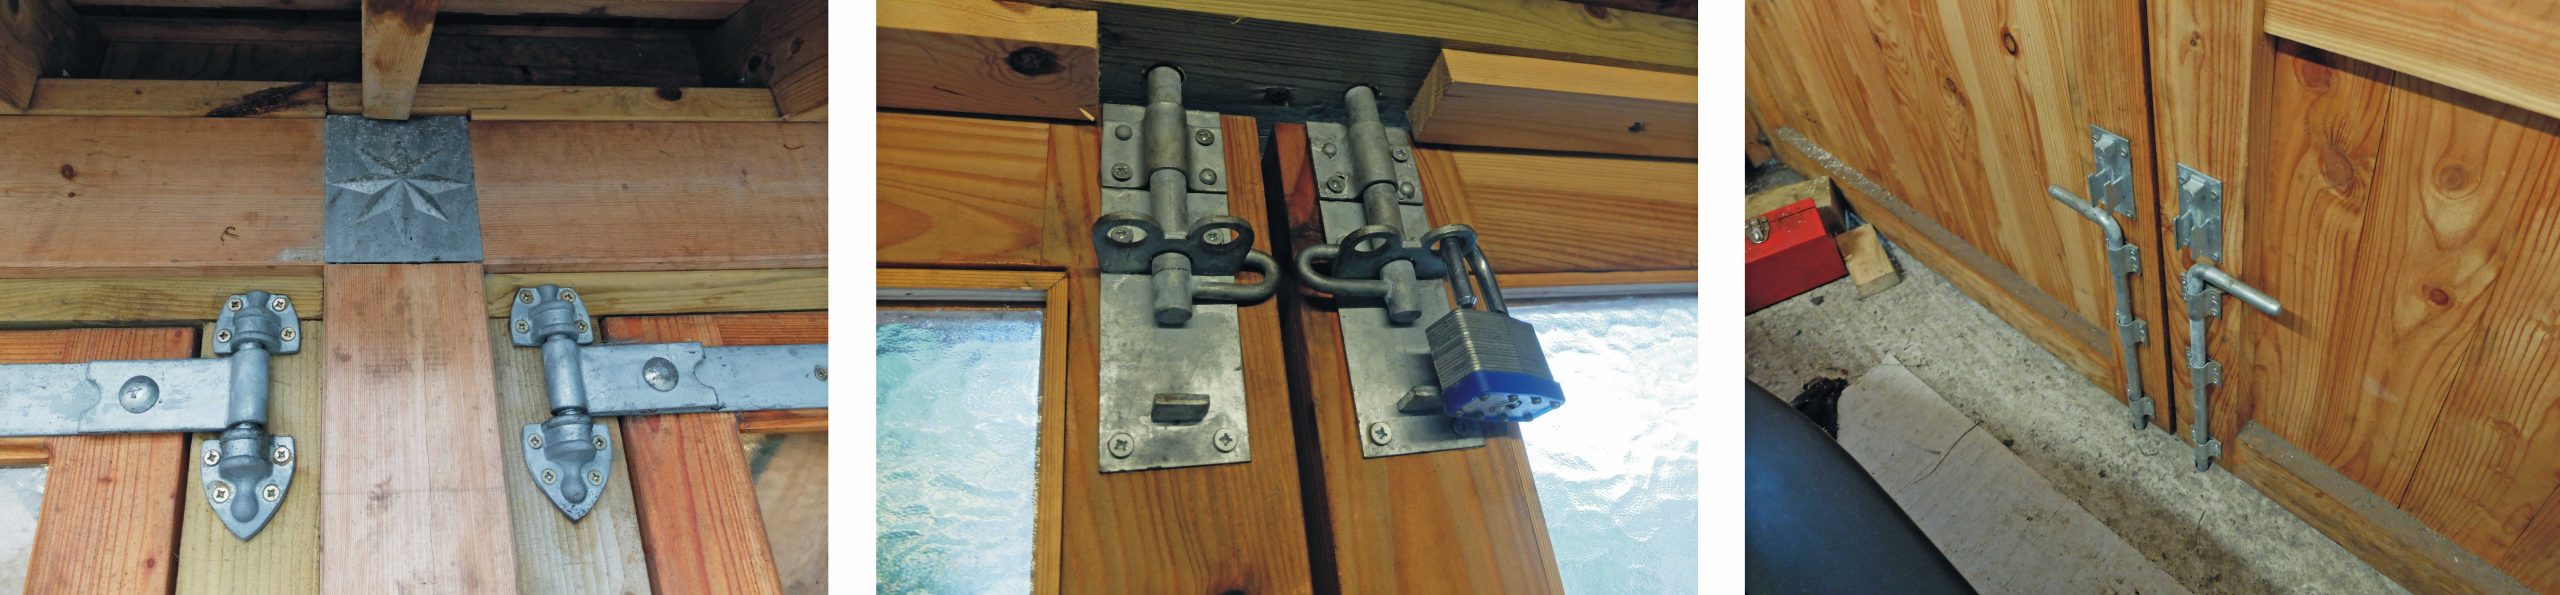
Above, left: These pieces of bent metal are designed to make it hard to remove the doors if the hinges are removed from the outside. They are only needed at the top as the bottom hinge is embedded in the concrete base. (This was necessary as the bottom rail of the door was not deep enough to allow the hinge to be positioned any higher.)
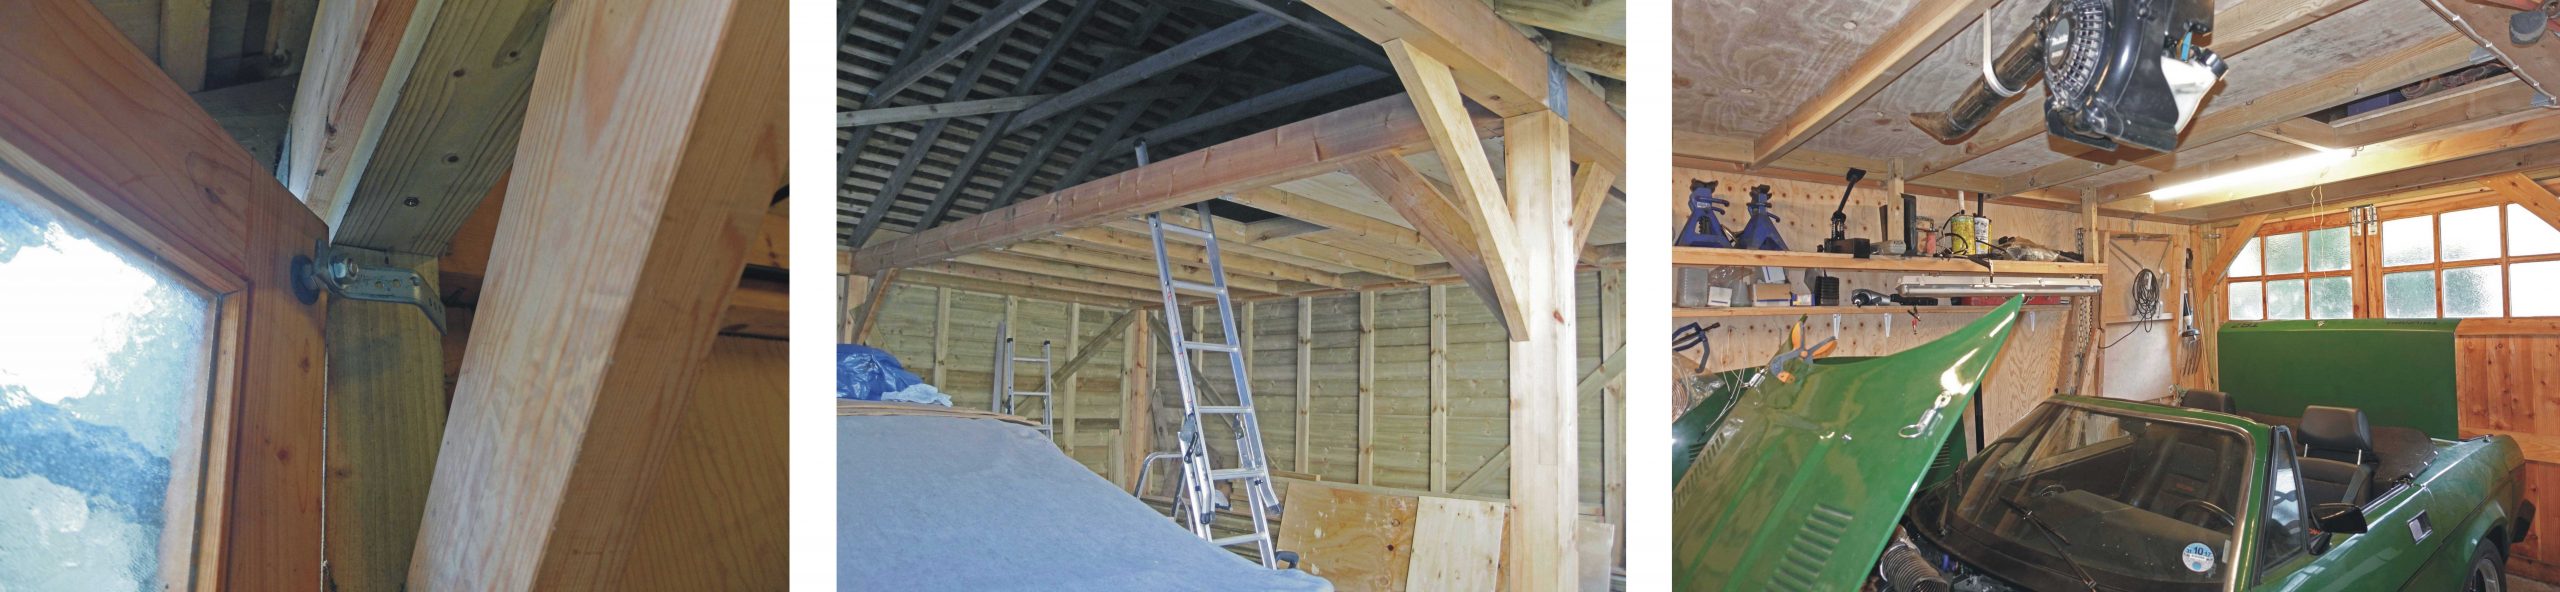
Above, centre:I put in a mezzanine floor in half the garage for storage. I didn’t install one on the other half as I fancied I might put in a car lift (hasn’t happened!) I used hangers to fit joists and screwed down 18mm ply as a floor.
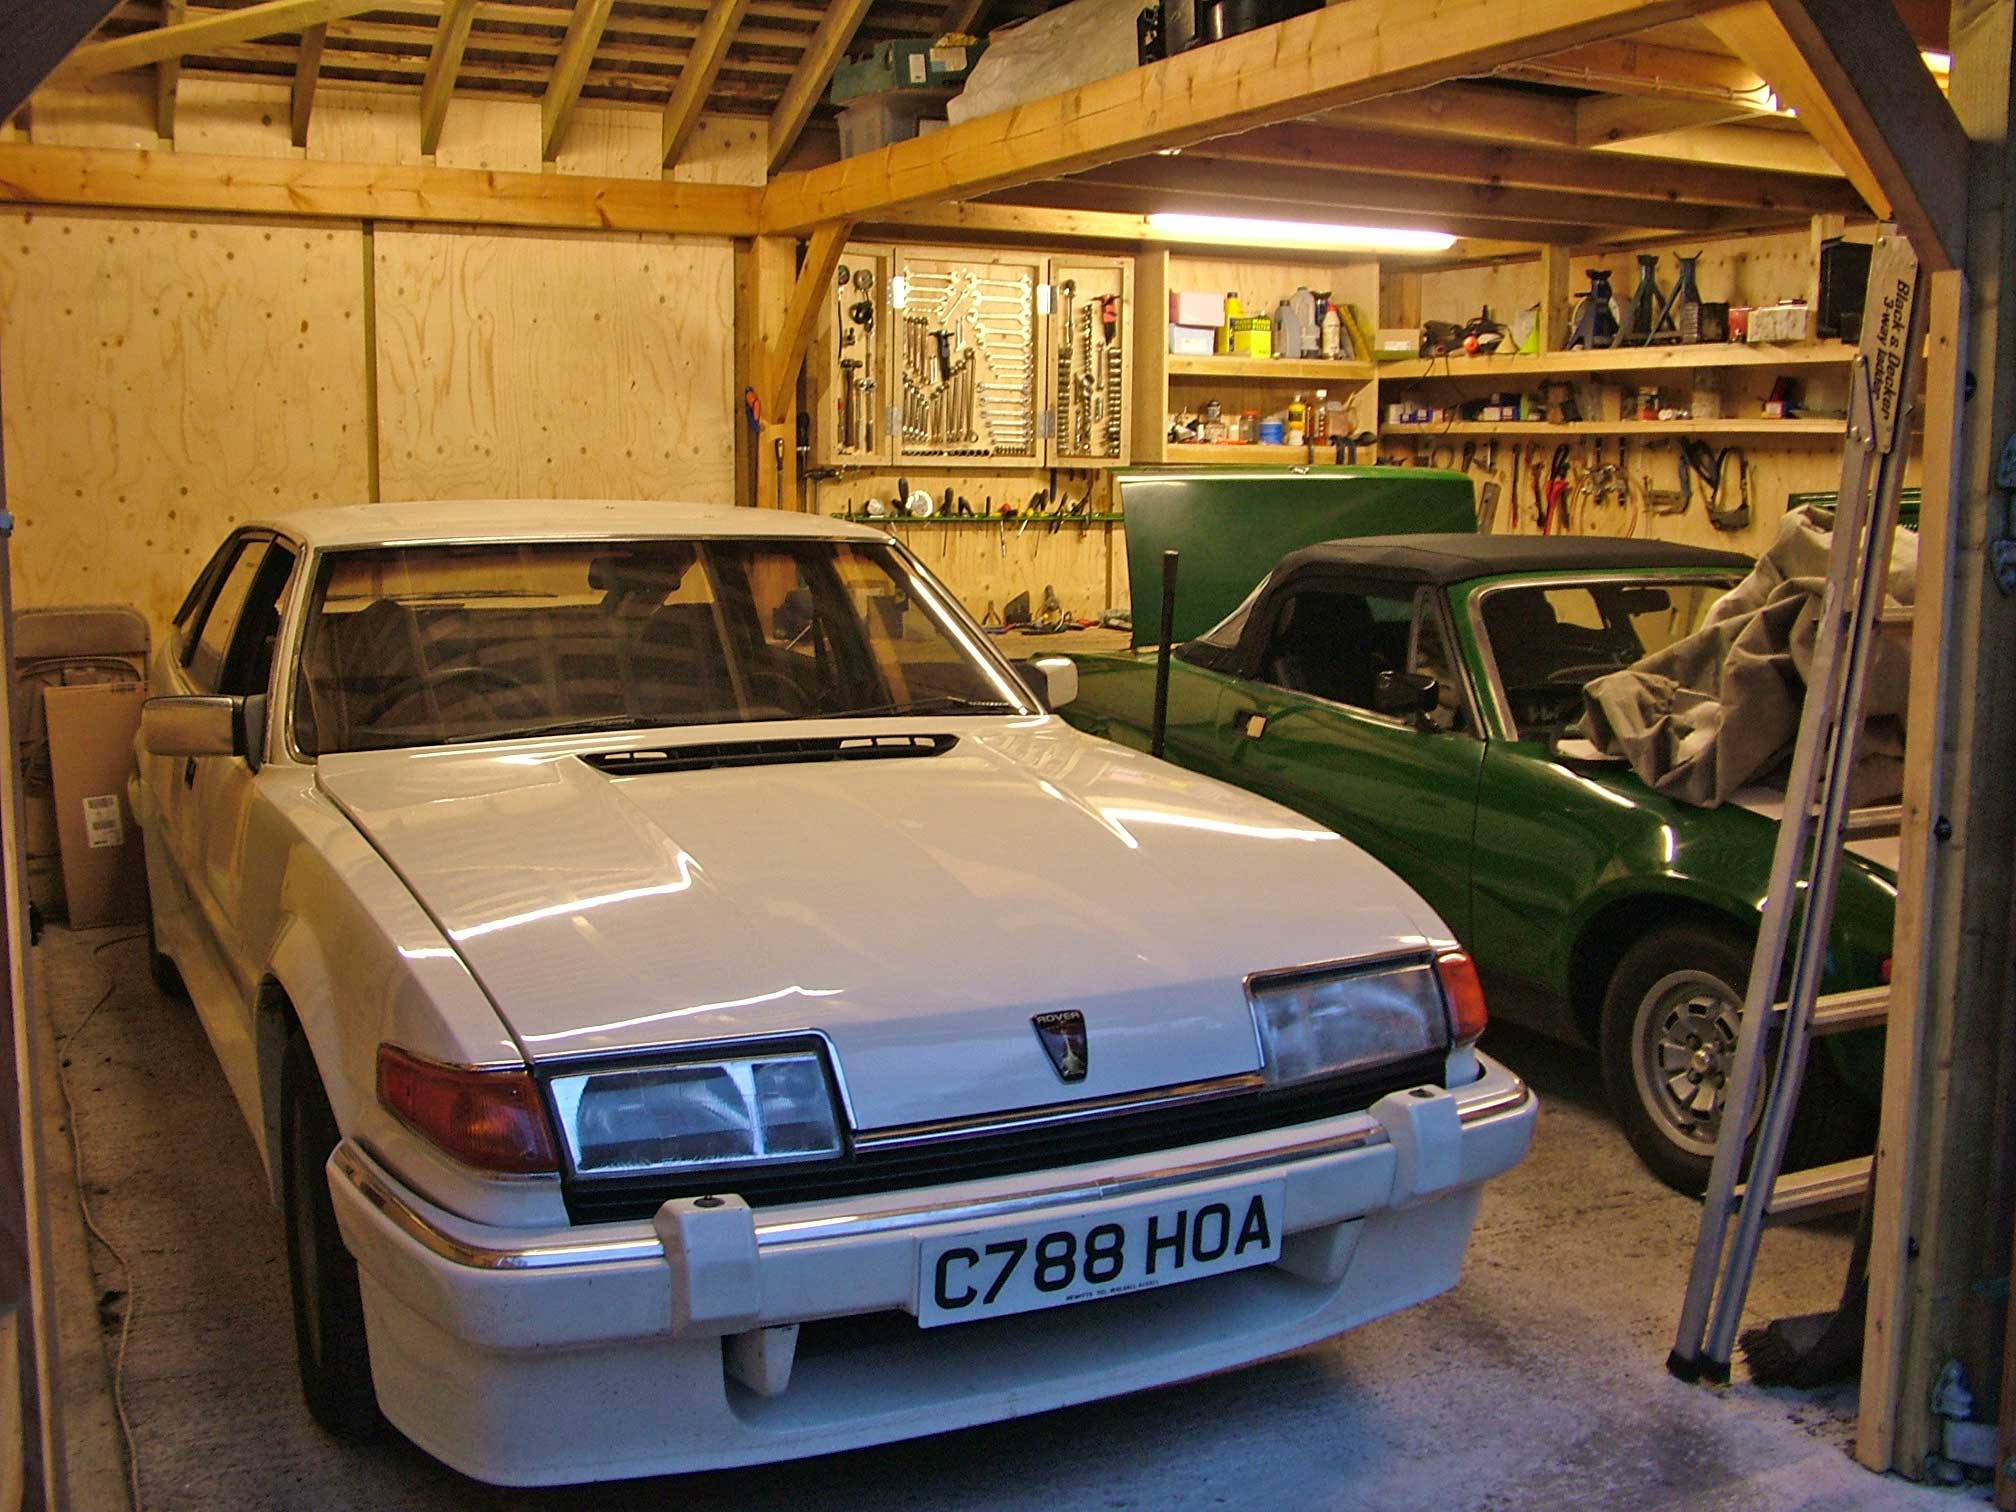
Above, right: The 18mm ply I have used to line the garage can just be seen through all the stuff which quickly accumulates once you put the garage to use.
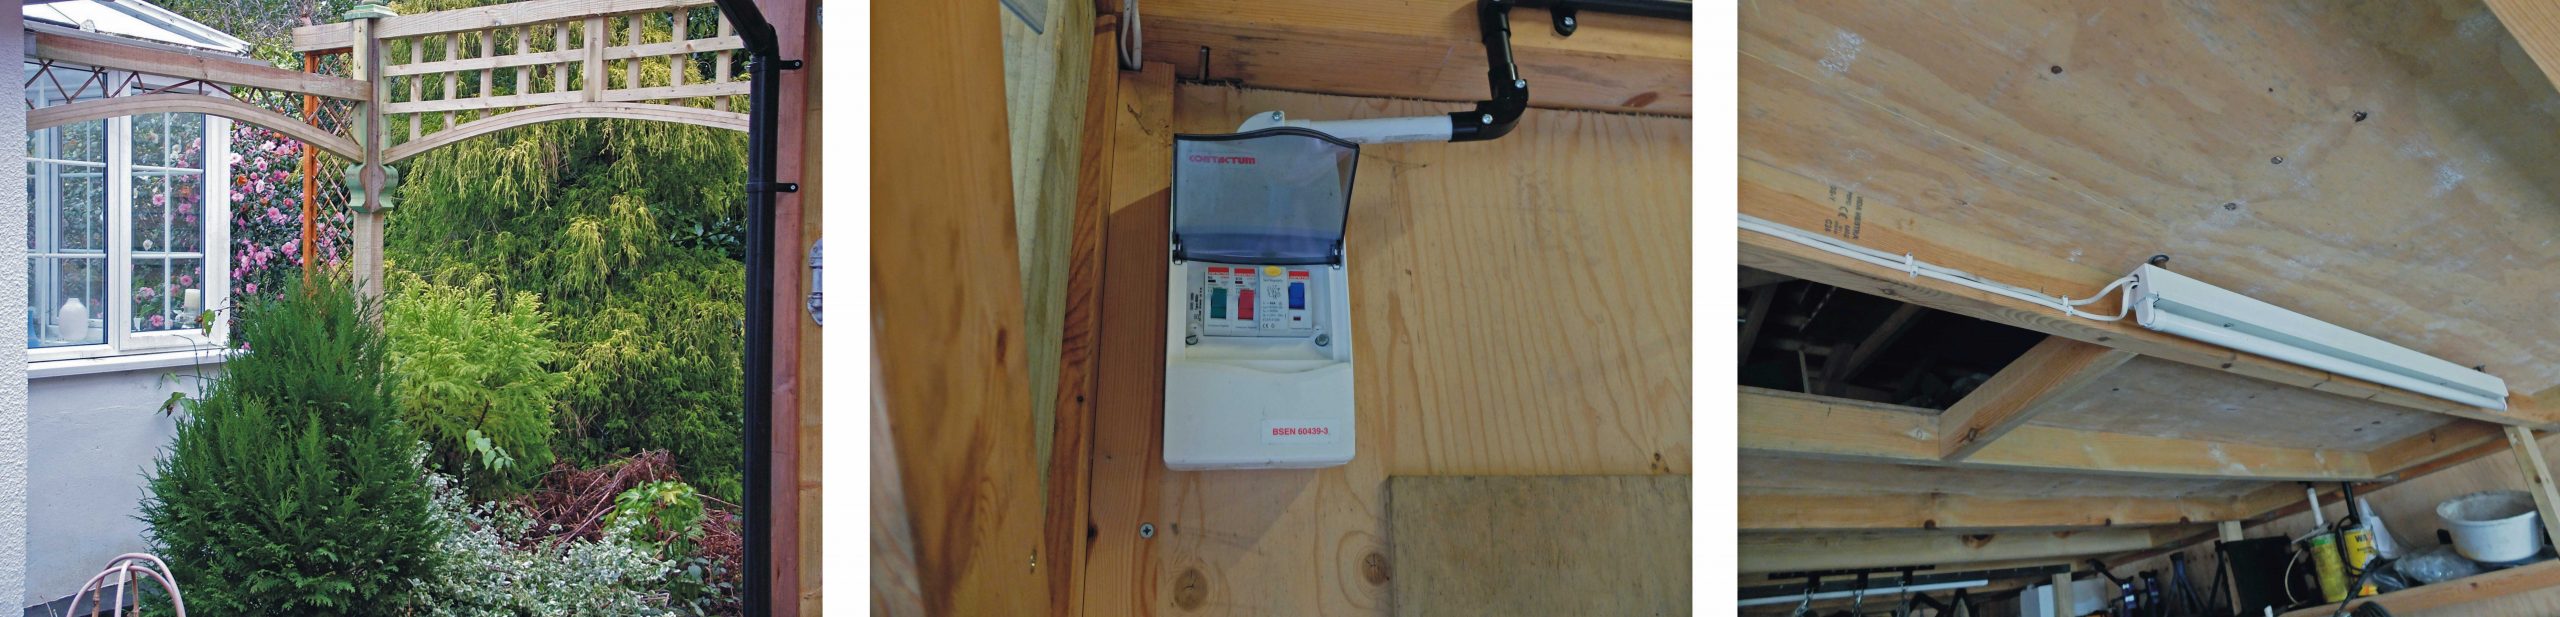
Above, left: I made a trellis arch to take the power supply from the house to the garage. The cable is in a plastic conduit not yet fitted in this picture. The trellis now also supports a nice rose and was the prototype, as it turns out, for the pergola etc. which I will (hopefully) describe elsewhere! Above, centre: The consumer unit. Above, right: Four five foot fluorescents give a good general light, (If I were fitting this out today, I would use LED panels, of course!)
Finishes
So far I have decided to leave the garage looking as natural as possible and have applied clear wood preservative on the doors cladding and exposed framing about once a year. I tried adding a small amount of raw linseed oil to the preservative on the doors but the overall visual effect was not what I hoped for and I will probably paint them when I can get round to it. The trouble with painting is once you start, you have to carry on for ever – there is no going back.
Costs & Final Conclusions
It probably cost about £10,000 and I can’t see how it could have been done for much less. I paid about £2000 for the base (which included demolishing the existing ramshackle car port thingy and removing 4” or so of the 8” of very hard concrete with pneumatic drills which lay under the crazy paving. The garage kit was about £6000, the doors about £700. I paid a friend to help me on and off for a couple of weeks and then the was stuff like 12 door hinges lots of 18mm ply for the lining and the mezzanine storage, lighting and power and all sorts of incidentals. Probably a bit more than £10,000 now I come to think about it!
Regarding the concrete base, something a bit smoother than what I ended up with would have been better. If the ridges are too high, using a crawler can be quite difficult. A polished surface would have been good. A nice bit of workshop flooring would solve the problem and be nice to lie down on but it ain’t cheap!
Ideally, I would have made the garage a little bigger. The garage is about 18×20”. If you have two large cars you want to work on at the same time, you really want something a little bigger. The problem is with the depth. If your car is about 15’ long you haven’t got much to play with! However, 18” was all the site would allow, so no Yank tanks, I’m afraid!
Overall, however, I am very pleased with the result and I have spent many hours enjoying myself there with various projects and keeping out of my wife’s hair!